
Apple Tree Trimming: How to Prune for Bigger Harvests
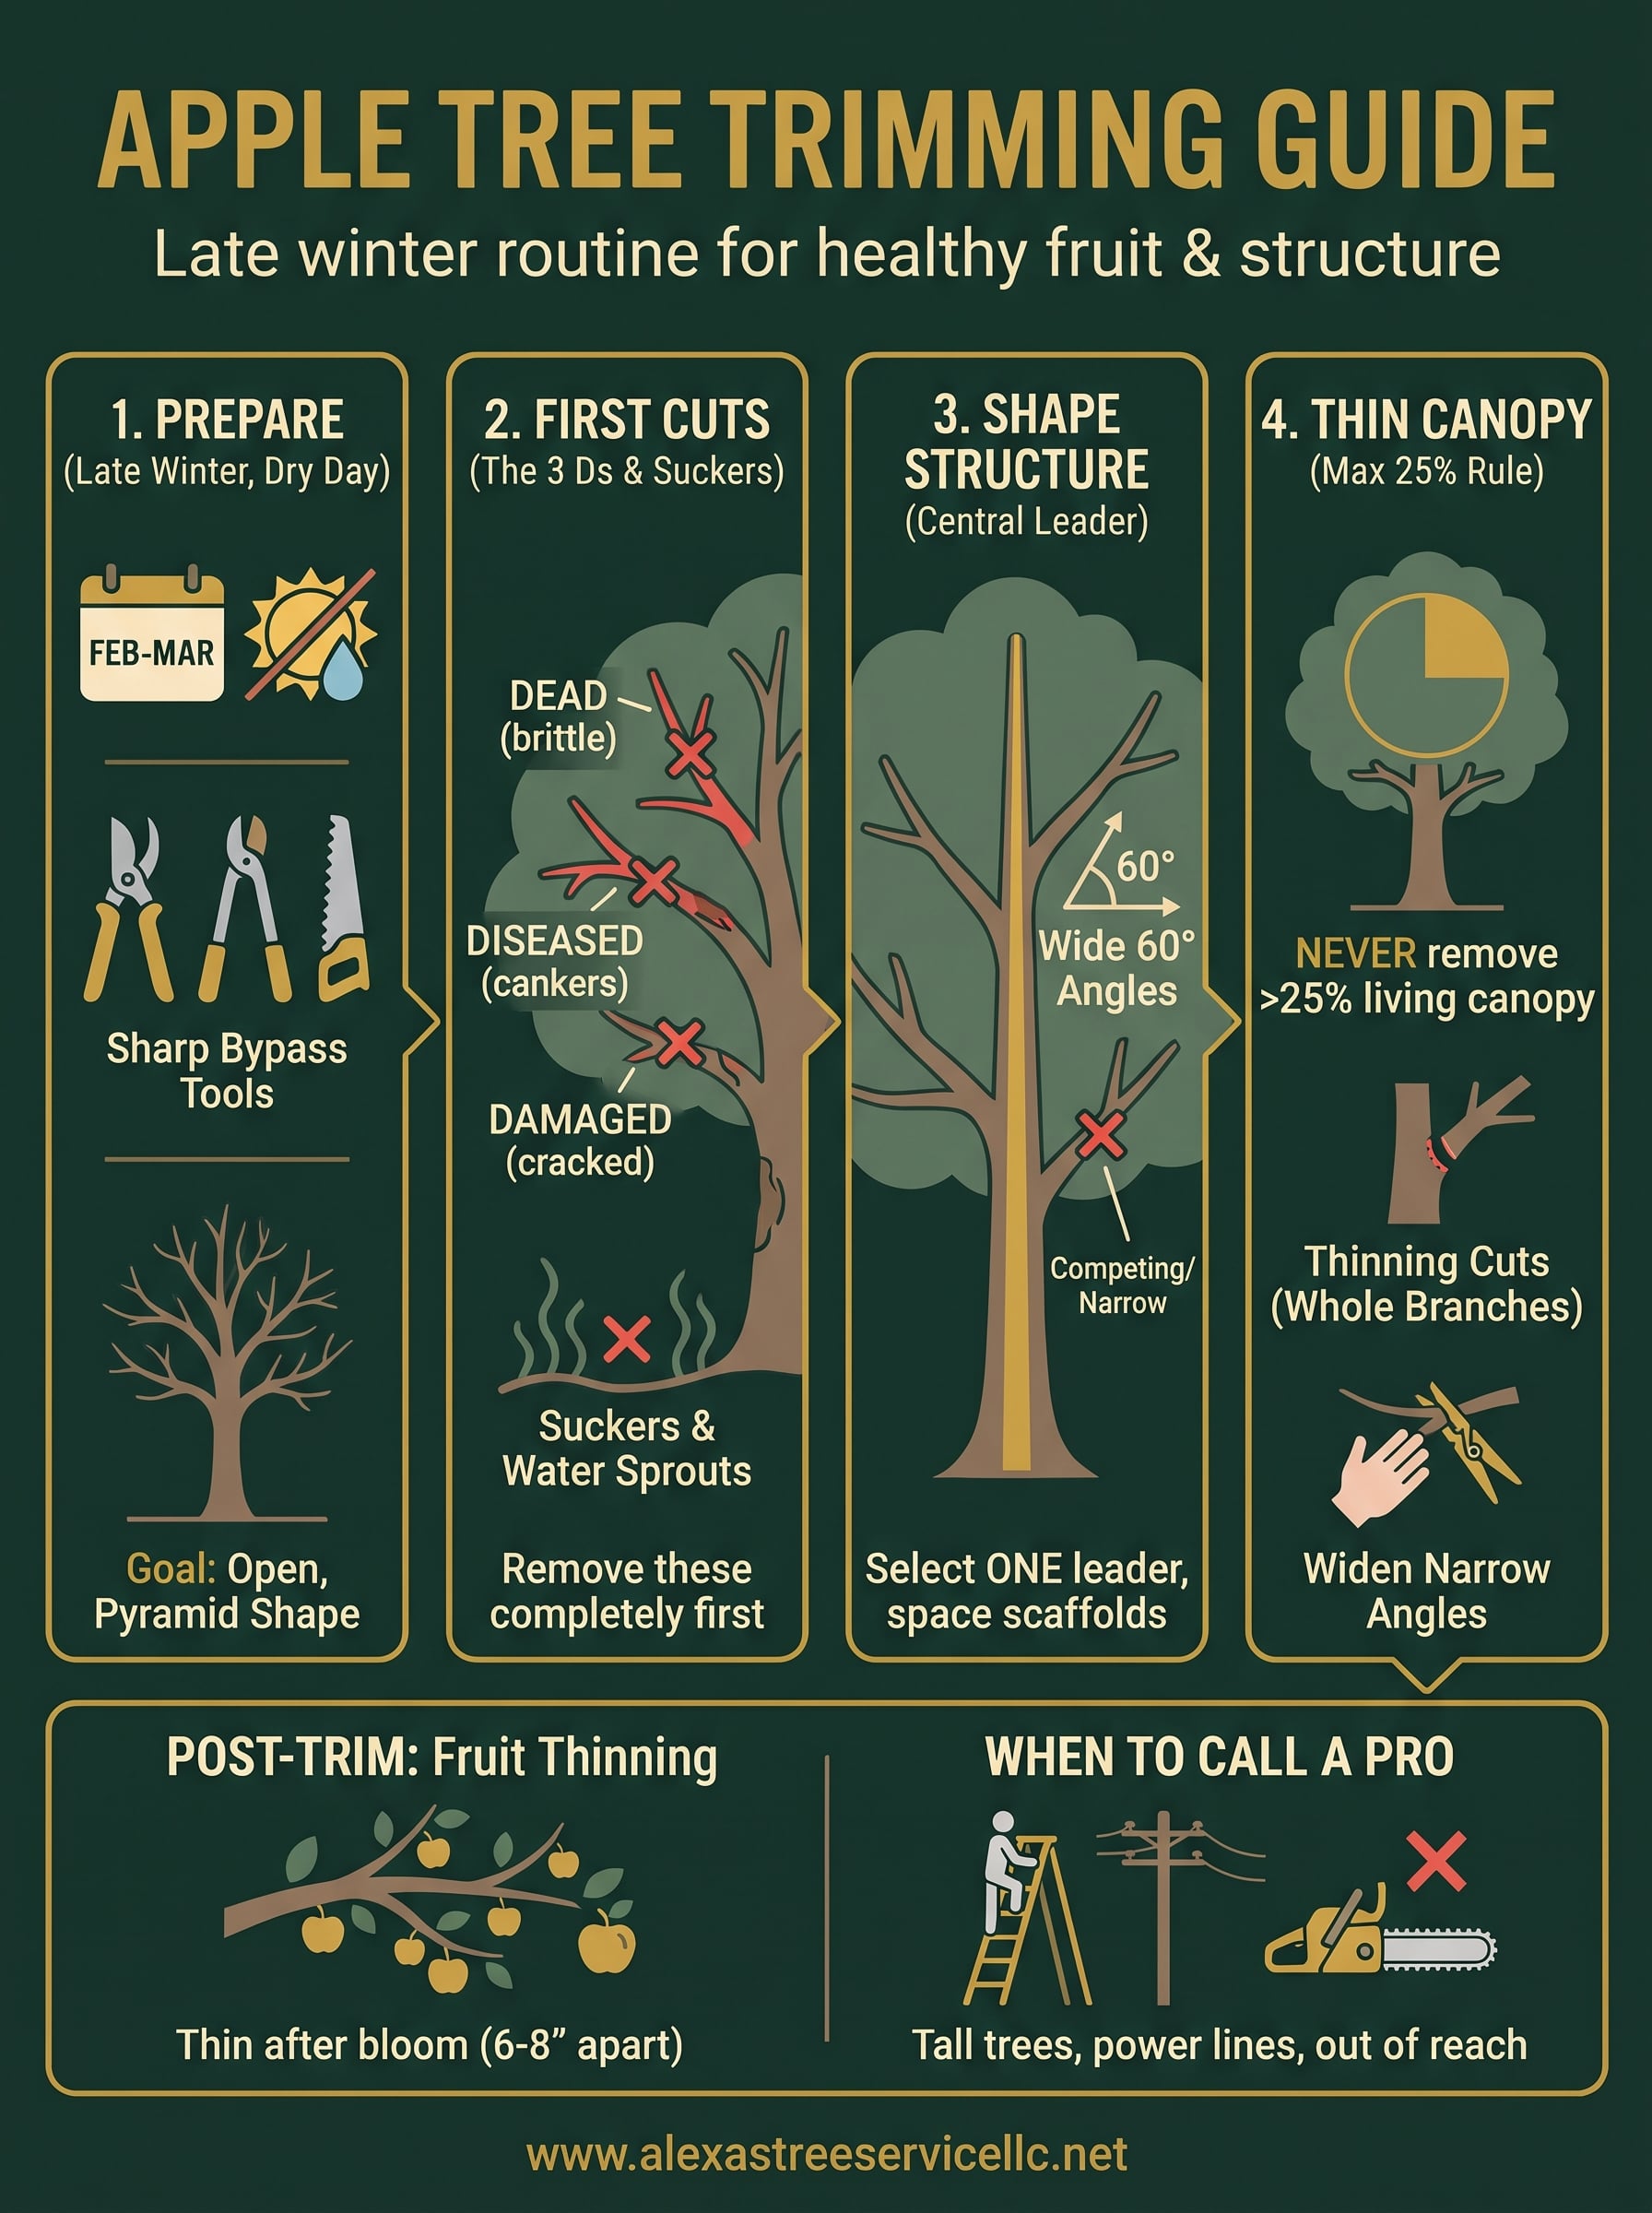
For apple tree trimming , prune once a year while the tree is dormant, in late winter. Cut in a fixed order: dead, diseased, and broken wood first, then crossing and downward-growing branches, then crowded growth. Never remove more than 25% of the living canopy in one season. Build the tree around one central leader with wide-angled side branches, and sunlight will reach the fruit.
Most people either never prune or make common pruning mistakes, such as cutting too much. An unpruned apple tree turns into a dense thicket that bears small fruit, often only every other year, and its limbs can snap under a heavy crop. A tree cut back too hard answers with a flush of leafy sprouts and few apples. Every cut feels permanent, so hesitation is normal.
This guide covers timing and tools first, then four steps you can follow in order. It is written for the Pacific Northwest, where wet winters affect when and how you cut. Alexa's Tree Service has trimmed trees around Vancouver, WA and Portland since 2006, so you will also find a clear point where the job is better left to a professional.
Before you cut: timing, tools, and goals
Trim apple trees once a year in late winter , with sharp, clean tools, and aim for an open, pyramid-shaped tree where light reaches every branch . Those three choices shape every step below.
The best time to trim apple trees
Late winter, while the tree is dormant and before buds swell, is the best window. In the Pacific Northwest that usually means February through March . A dormant tree suffers less shock, you can see its structure without leaves, and most diseases are less active. Pick a dry day , because wet weather helps fungal diseases spread, and our winters are wet.
Some cuts cannot wait for winter. Remove dead, broken, or diseased wood, suckers, and water sprouts whenever you spot them. Avoid heavy trimming in summer and fall, since it prompts tender new growth that cold weather can damage.
Trim in late winter on a dry day, and trim a little every year.
Tools that make clean cuts
Clean cuts heal faster, so sharp bypass tools matter more than expensive ones. Match the tool to the branch, and wipe the blades with 70% rubbing alcohol between trees and after cutting any diseased wood.
| Tool | Branch size | Best use |
|---|---|---|
| Bypass hand pruners | Up to about 3/4 inch | Small shoots, suckers, bud cuts |
| Loppers | Up to about 1.5 inches | Medium branches |
| Pruning saw | Over 1.5 inches | Large limbs |
| Pole pruner | Out of reach | High branches, with your feet on the ground |
What a well-trimmed tree looks like
A central leader tree has one upright trunk with side branches (scaffolds) spiraling around it, shorter toward the top. The outline is a cone. Every branch gets sun, air moves through the canopy, and you can pick fruit without a tall ladder.
Step 1. Remove dead, damaged, and unwanted growth
Start every trimming session by removing wood that does nothing for the tree: dead, diseased, or damaged branches , then suckers and water sprouts. These cuts are the easiest and the least debatable, and they clear the view for the decisions that follow.
Cut the three Ds first
Dead wood is brittle, has no live buds, and often looks gray or shriveled under the bark. Diseased wood may show sunken, discolored patches (cankers) or oozing. Damaged wood includes anything cracked by wind or fruit load. Cut each one back to healthy wood , at the branch collar, which is the slightly swollen ring where the limb joins the trunk or a larger branch.
Remove suckers and water sprouts
Suckers grow from the roots or low on the trunk. Water sprouts are the pencil-thick vertical shoots that shoot up from branches. Neither bears useful fruit, and both crowd the canopy. Cut them off flush at the base , and do it every year, since they return.
Make clean cuts on large limbs
For any limb thicker than your thumb, use the three-cut method so the bark does not tear down the trunk:
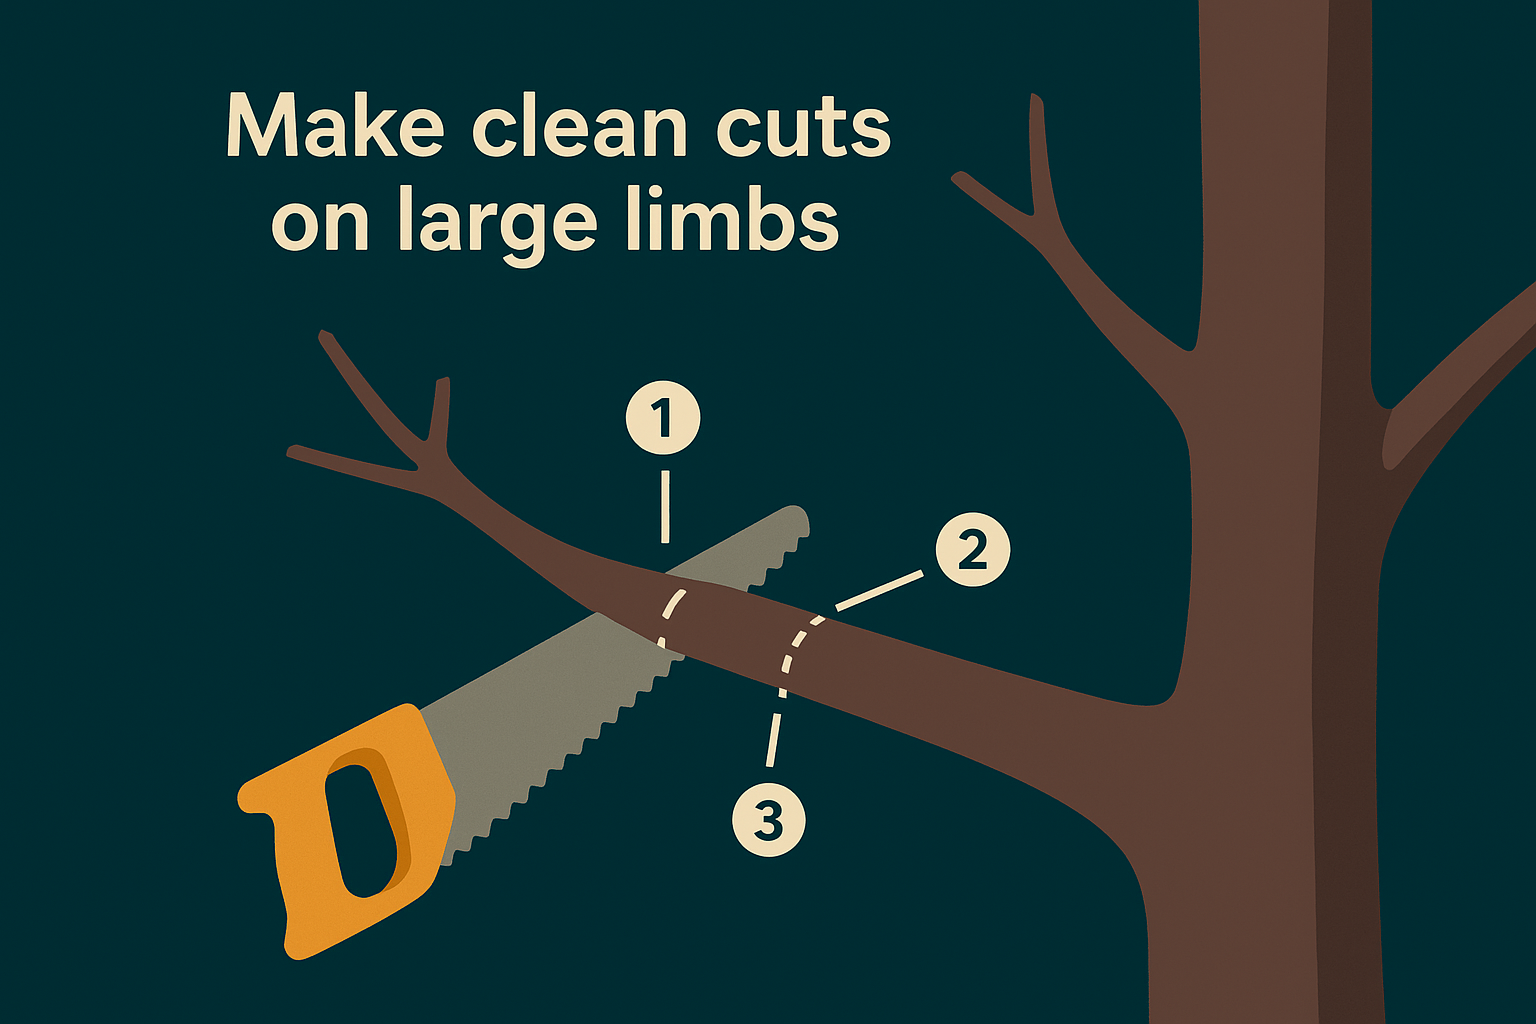
- Cut about 12 inches from the trunk, a quarter of the way through from the underside .
- Cut from the top a couple of inches farther out. The limb drops.
- Cut the stub off just outside the branch collar.
Skip wound paint. A dormant-season cut heals fine without it. When you shorten a shoot, cut about 1/4 inch above an outward-facing bud, on a slight slant.
Cut at the branch collar, never flush with the trunk and never leaving a stub.
Step 2. Select a leader and scaffold branches
Choose one upright central leader and a set of well-spaced scaffold branches, then remove whatever competes with them. Most backyard apple trees do best on this structure, because it is compact, strong, and easy to manage.
Pick one central leader
Find the straightest, most vigorous upright shoot at the top and make it the leader. If two shoots compete, remove the weaker one . On a young tree, shorten the leader so it stands about 24 to 30 inches above the top set of scaffolds, cutting just above a bud. An unbranched young tree (a whip) is cut back to 28 to 36 inches above the ground at planting.
Some growers prefer an open center (vase) shape, with three or four main limbs and no leader. It works, but it asks for more training. Unless you already have a vase-shaped tree, stay with the central leader.
Space the scaffolds
Good scaffolds are spaced up the trunk and point in different directions, so no limb sits directly over another. Use these rules:
- Leave about 6 to 12 inches of trunk between scaffolds.
- Favor wide angles near 60 degrees from the trunk, which is the 2 o'clock and 10 o'clock positions on a clock face.
- Remove any limb along the trunk that is thicker than the trunk itself.
- Remove branches that angle sharply upward in a narrow V.
Wide angles matter because narrow crotches trap bark and split when the crop gets heavy. Branches that grow nearly vertical also make leaves instead of fruit.
One leader, wide-angled scaffolds, and no competition: that structure carries a heavy crop.
Step 3. Thin the canopy and widen branch angles
Thin the remaining canopy with thinning cuts , which remove an entire branch back to its origin. Avoid heading cuts that only shorten branches, because they trigger dense, vertical regrowth. Then train the branches you keep toward a wider angle.
Remove problem branches
Walk around the tree and look for the following. Work from the top down, and take out the largest offenders first.
| Problem branch | Why it hurts | What to do |
|---|---|---|
| Crossing or rubbing | Wounds bark, invites disease | Remove the weaker branch at its base |
| Growing downward | Shaded, produces little fruit | Remove |
| Growing inward toward the trunk | Crowds the center | Remove |
| Forked limb (two shoots from one point) | Weak joint that can split | Remove one |
| Thicker than the trunk | Competes with the leader | Remove |
Respect the 25% limit
Never remove more than 25% of the living canopy in one season. Heavier cuts expose bark to sunscald and push the tree to grow leafy shoots instead of fruit. Picture the canopy as 20 equal sections of wood: take out no more than 5. If the tree needs more, finish next winter. Spur-type varieties, which carry fruit on short spurs along the limbs, need an even lighter hand.
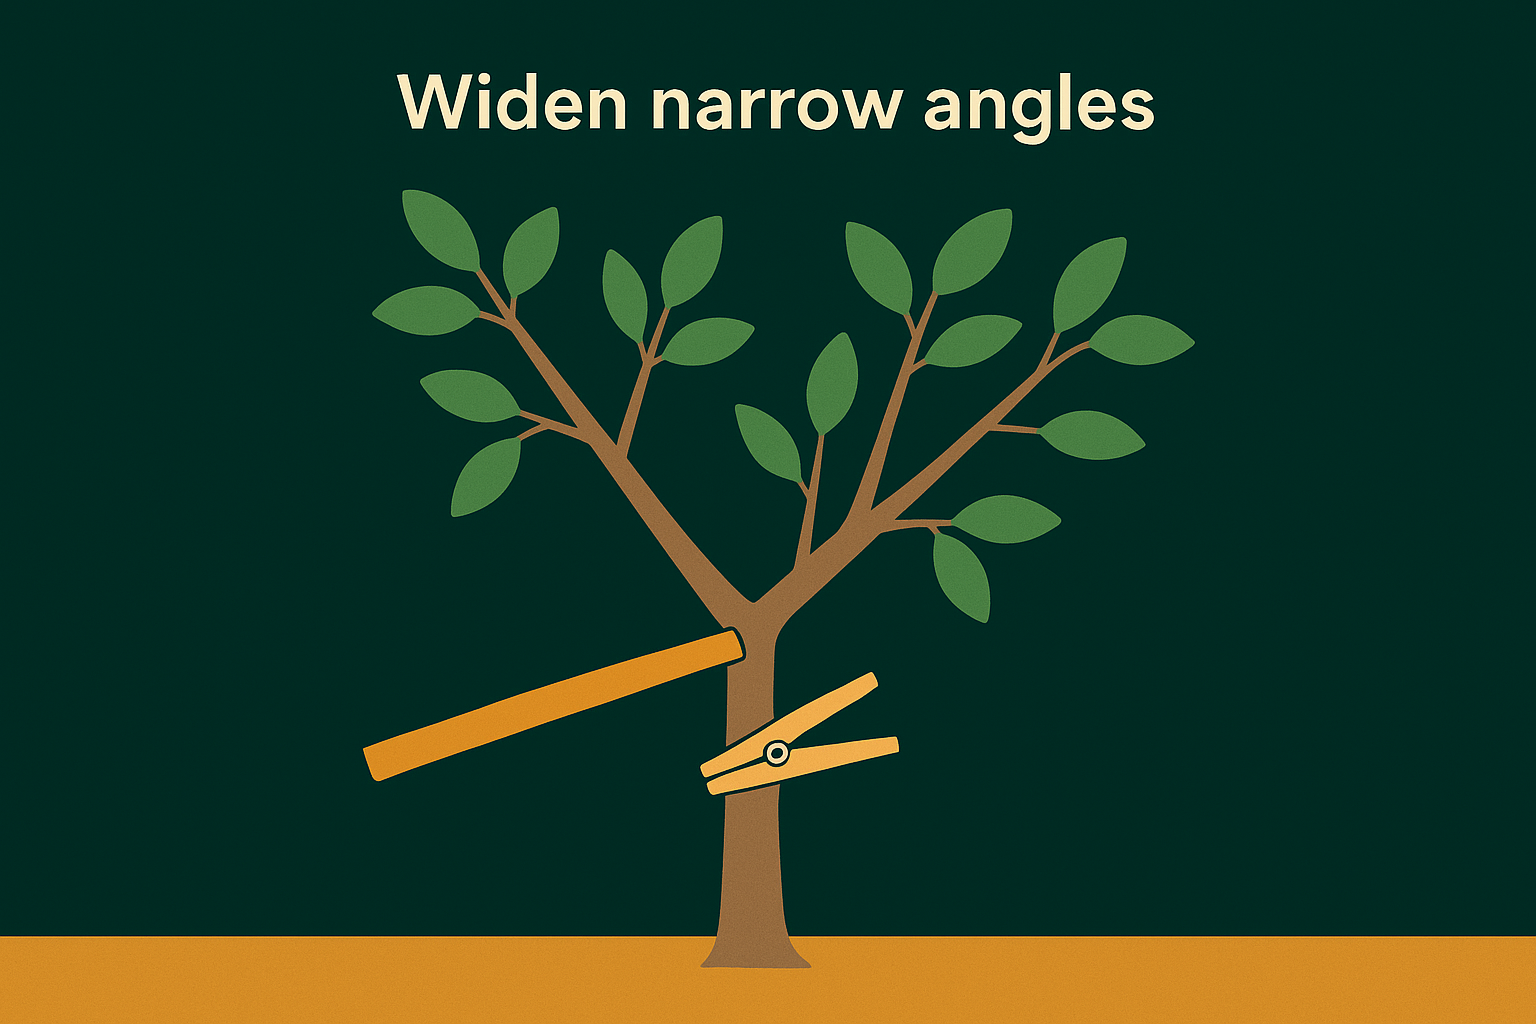
Widen narrow angles
Young branches that grow too upright can be bent. Use a notched stick or a store-bought spreader wedged between branch and trunk. For shoots under 6 inches, a wooden spring clothespin clipped to the leader works. Aim for about 60 degrees , not flat, and remove the spreaders at the end of the growing season so they do not cut into the bark.
Thin by removing whole branches, and stop at 25% of the canopy.
Step 4. Finish up, thin fruit, and know your limits
Finish by stepping back to check the tree, cleaning up, and planning to thin the fruit after bloom. Then decide honestly whether the remaining work is a job for you or for a professional.
Check your work and clean up
Look at the tree from several sides. Sun should reach the inner branches, and the cone shape should be visible. Fix anything that looks lopsided, then stop. Rake up the prunings. Remove cankered or diseased wood from the property instead of leaving it on the ground, and wipe your tools before you put them away.
Thin the fruit
Trimming sets up the crop, and fruit thinning finishes it. Within about 20 to 40 days of full bloom , thin so the remaining apples sit 6 to 8 inches apart . In a cluster, keep the center "king" fruit, which grows largest. Thinning reduces limb breakage, improves size and color, and helps prevent the alternate-year bearing that overloaded trees fall into.
When to call a professional
Hand the job over when limbs are out of safe reach from the ground, near power lines, or part of a large neglected tree. Restoring an overgrown tree takes about two winters , removing no more than 25% each year. Alexa's Tree Service is licensed and insured, lists tree trimming at $200 to $800+, and gives free estimates, so you can see the cost before you commit.
If you need a ladder and a chainsaw to reach it, hire it out.
Trim a little each year
Apple tree trimming comes down to a simple routine. Cut in late winter, remove dead and damaged wood first, build around one leader with wide-angled scaffolds, thin crowded branches, and stay under 25% of the canopy. Thin the fruit after bloom, and repeat every year. Small, regular trims beat a rescue job every time.
If your tree is too tall, too overgrown, or too close to a roof or power line to trim safely, you do not have to risk it. Request a free estimate for professional apple tree trimming from Alexa's Tree Service and we will tell you what the tree needs before any work starts.