
How to Trim an Oak Tree Without Risking Oak Wilt
Cut into an oak at the wrong time of year and you can invite a disease that kills the tree within a few seasons. That's the real risk behind trimming a oak tree , and it's why so many Pacific Northwest homeowners hesitate before grabbing the loppers. Oak wilt spreads through fresh wounds, carried in by sap beetles that are most active in warm months, so timing matters as much as technique.
If you're wondering how to prune an oak safely, the short answer is: cut during dormancy, seal the wounds fast, and never trim during active beetle season. This guide walks through the proper oak tree trimming window for our region, the cuts that actually improve tree health versus the ones that invite trouble, and the warning signs that mean it's time to stop DIY pruning and call a licensed arborist.
We've handled tree trimming oak jobs across Vancouver, Portland, Camas, and Battle Ground for over 15 years, and we've seen what happens when well-meaning homeowners prune at the wrong moment. Below, you'll get the same seasonal rules and cutting practices our crews follow on every job site.
Why timing matters when trimming an oak tree
Oak wilt spreads fastest through fresh pruning wounds left open during warm weather. Sap beetles pick up spores from fungal mats on infected trees, then land on newly cut oaks hunting for sap. Once the fungus enters the vascular system, it clogs the tree's water flow and can kill a mature oak in as little as one growing season. This is why the USDA Forest Service treats pruning timing as a genuine safety rule, not a suggestion, and it's the same standard our crews follow on every oak tree trimming job.
Cut an oak between April and October, and you're gambling with a disease that has no cure.
The safe dormant window
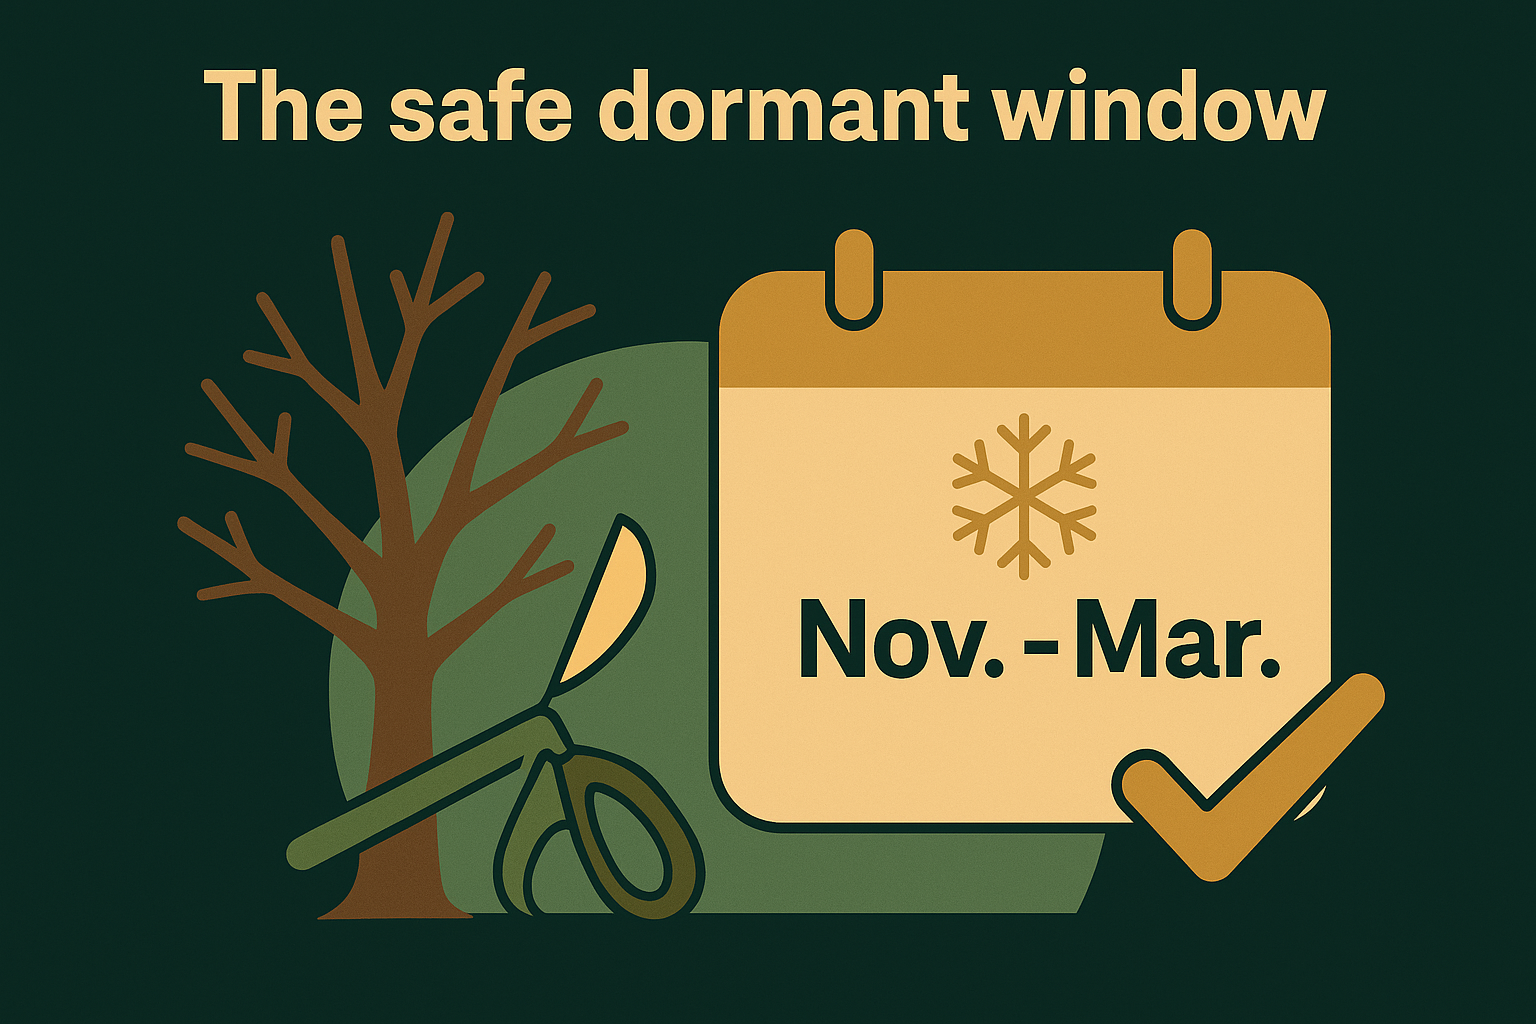
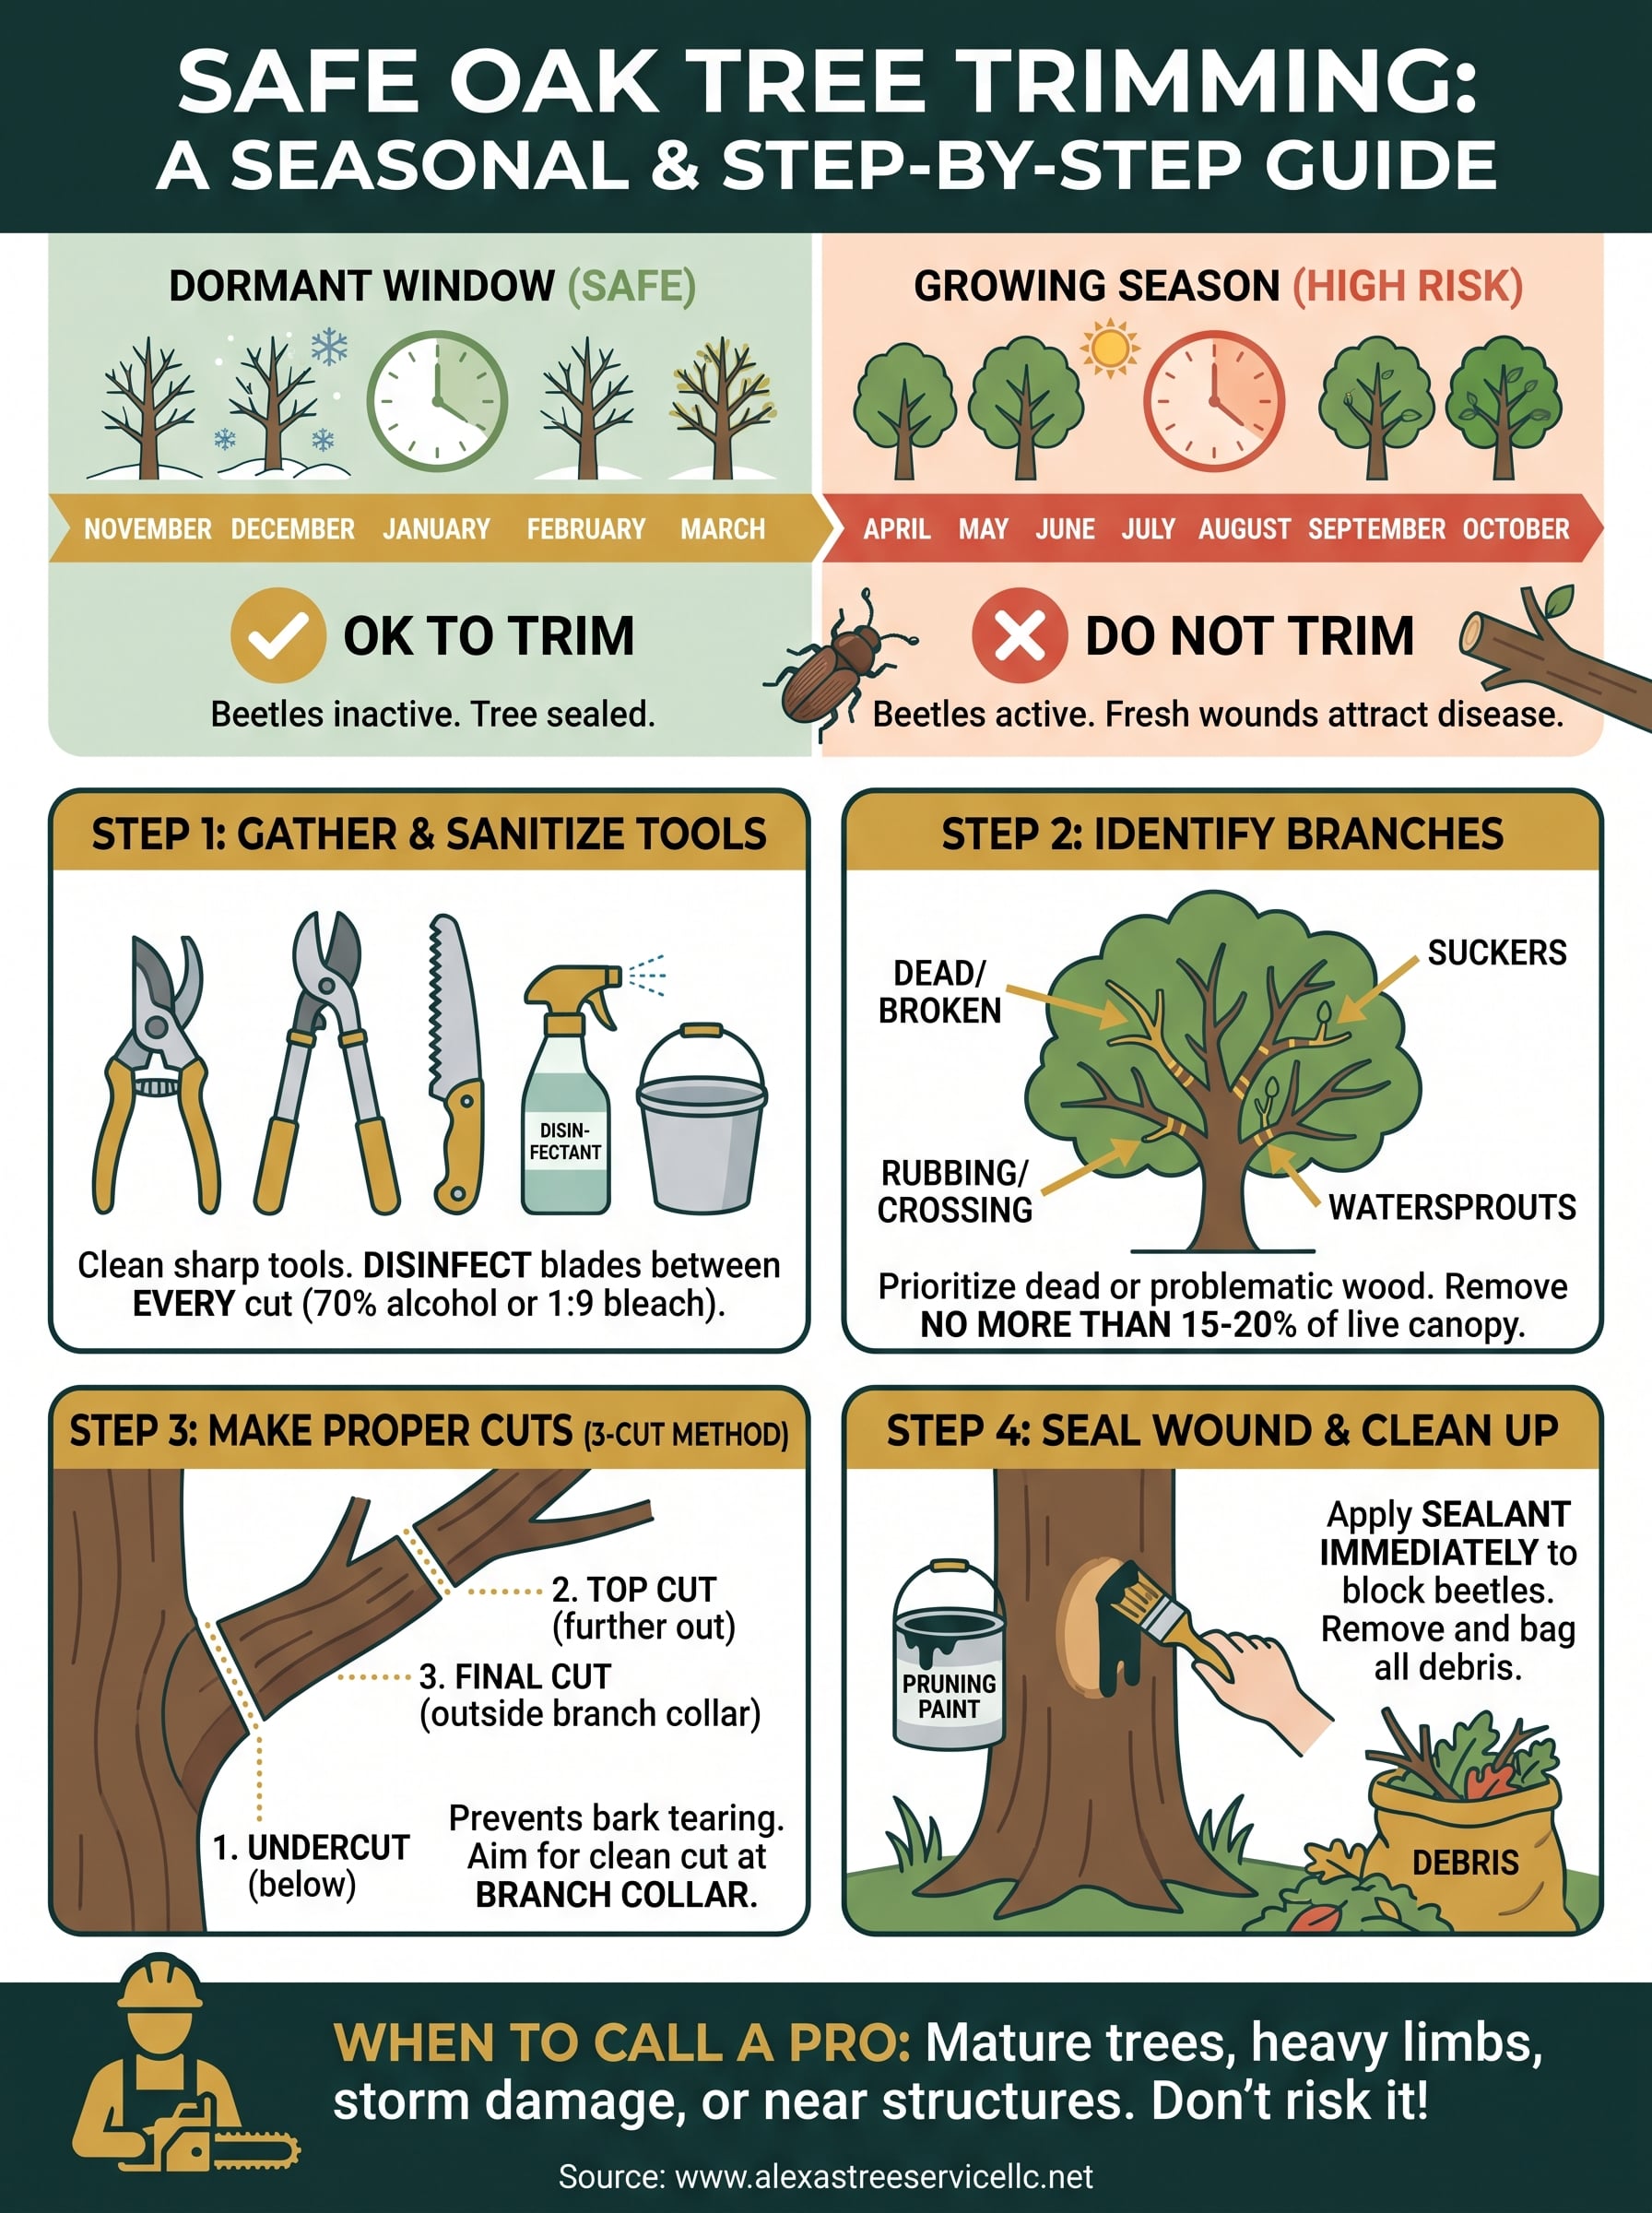
Trim oaks only when beetles aren't active and the tree isn't producing fresh sap for them to smell. In the Pacific Northwest, that window runs from late fall through late winter , and there are good reasons arborists recommend winter trimming, including months of lead time to plan the work without rushing.
| Season | Months | Safe to trim? |
|---|---|---|
| Dormant | November - March | Yes |
| Early spring | April | No |
| Growing season | May - September | No |
| Early fall | October | No, transition risk |
Stick to this schedule even if a branch looks like it needs attention now, unless it's actively hazardous to people or property, and read up on what time of year you should not trim trees before you plan any other work in the yard.
Why summer cuts carry the highest risk
Warm months bring the heaviest beetle activity and the fastest fungal mat formation, so tree trimming oak species in June, July, or August carries the highest risk of any point in the year. Storm damage is the one exception worth noting: a broken limb hanging over a driveway or roof needs to come down regardless of season, but you should seal that cut immediately and watch the tree closely in the weeks after.
Step 1. Gather and sanitize your pruning tools
Start with clean, sharp tools before you make a single cut. Dirty blades spread more than oak wilt; they also drag through bark and leave ragged wounds that heal slowly instead of sealing over. Grab a pair of bypass hand pruners for small branches, loppers for anything up to two inches thick, and a pruning saw for larger limbs. Skip anvil-style pruners on live wood since they crush tissue instead of slicing cleanly through it.
Disinfect between every cut
Sanitizing isn't something you do once before you start work; you need to wipe blades down between cuts, especially on a tree that might already carry disease.
A pruning tool that touches diseased wood and then healthy wood spreads oak wilt just as fast as a beetle does.
Keep a simple disinfecting solution nearby in a spray bottle or small bucket:
 Disinfecting solution options:
- 70% isopropyl alcohol (ready to use, no dilution needed)
OR
- 1 part household bleach to 9 parts water (rinse tools after to prevent rust)
Spray or dip blades between cuts and let them air dry a few seconds before moving to the next branch. This habit adds maybe a minute per cut, but it's the cheapest insurance you'll find against spreading disease through a mature oak worth thousands in landscape value.
Step 2. Identify which branches to remove
Walk the entire canopy before you cut anything, looking for dead or diseased wood first since these branches offer zero benefit to the tree and often harbor pests or fungus that can spread inward, and learn the other signs a tree needs pruning while you're looking. Cross-checking each limb against a simple list keeps you from second-guessing once you're up on a ladder with pruners in hand.
Priority branches to remove
- Dead, broken, or split limbs
- Branches rubbing or crossing another branch
- Suckers growing from the base or trunk
- Watersprouts shooting straight up from main limbs
- Limbs growing back toward the trunk instead of outward
Removing the wrong five percent of branches does more damage than skipping pruning altogether.
What to leave alone
Healthy limbs with good spacing and a natural outward angle should stay put, even if the canopy looks a little wild to you. Oaks don't need aggressive shaping like ornamental trees do; over-thinning is one of the most common pruning mistakes, since it stresses the tree and opens up more wounds than necessary. Aim to remove no more than 15 to 20 percent of the live canopy in a single season, and mark your target branches with chalk or tape before you start cutting so you don't lose track mid-job.
Step 3. Make clean, proper pruning cuts
As with any safe way to trim or prune a tree, position your cut just outside the branch collar , that slightly swollen ring where a limb meets the trunk. Cutting too close removes the collar tissue the tree needs to seal itself; cutting too far leaves a stub that never heals and invites decay.
A clean cut at the branch collar heals in one season; a ragged stub can stay open for years.
The three-cut method for larger limbs
For anything over two inches thick, use three cuts to prevent bark tearing down the trunk:
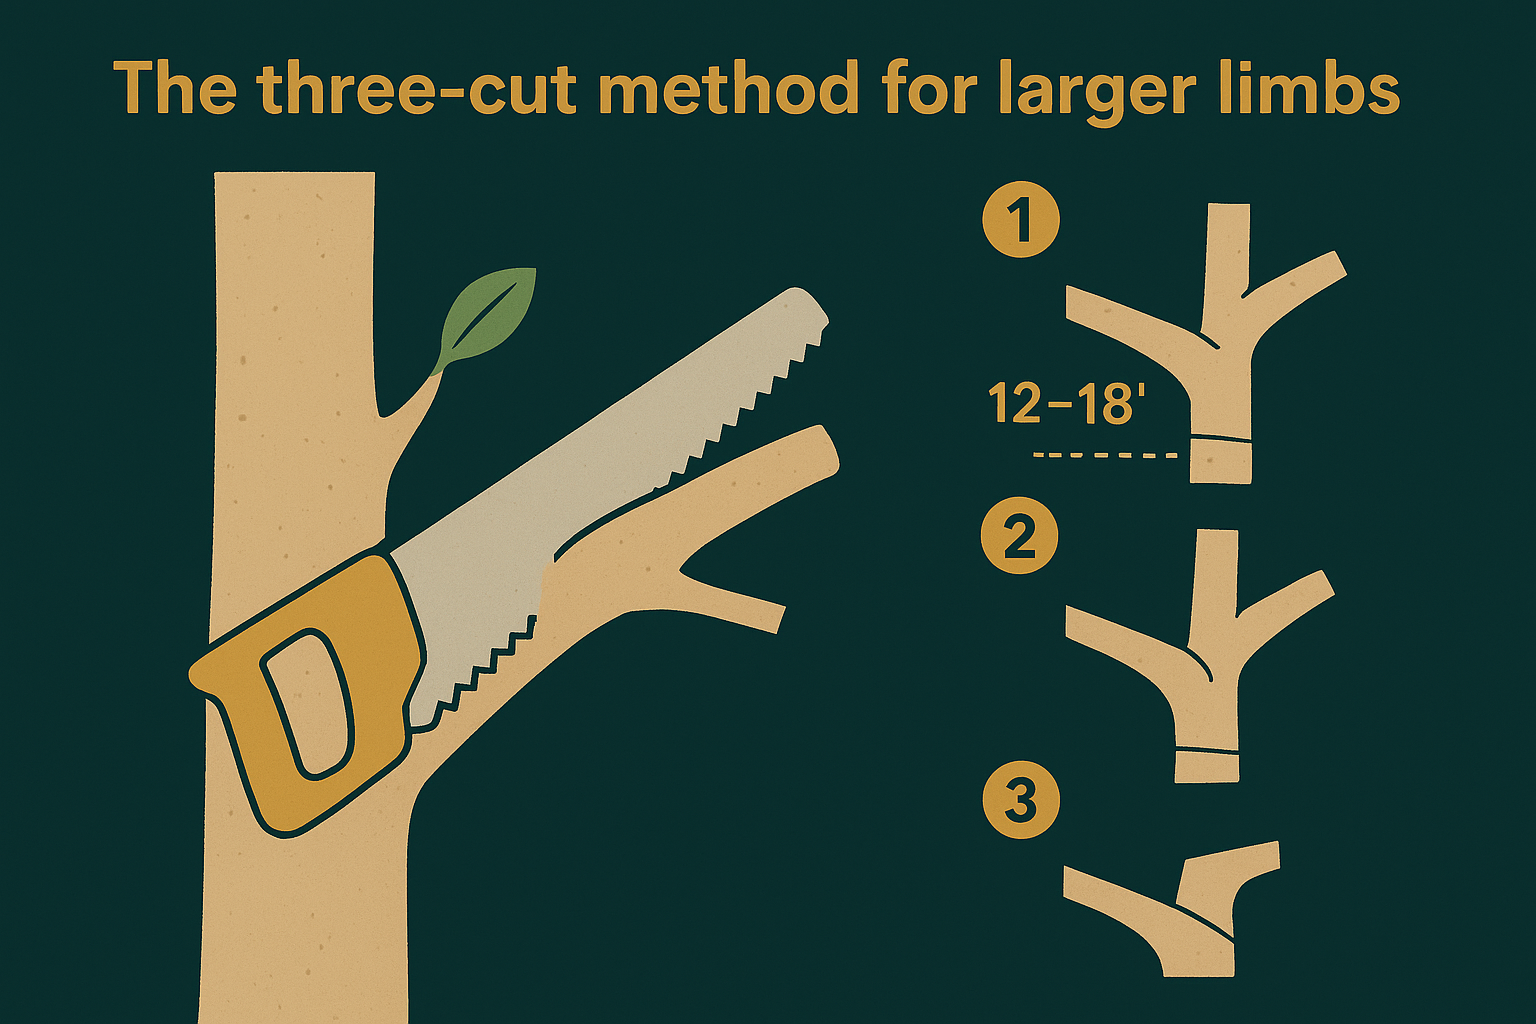
- Undercut - 12 to 18 inches from the trunk, cut one-third through from below.
- Top cut - a few inches further out, cut through to remove the weight.
- Final cut - trim the remaining stub just outside the collar.
This sequence keeps bark from ripping as the branch falls, something that happens often when you skip straight to one cut on a heavy limb.
Angle and direction
Angle each final cut slightly downward and outward so rain runs off the wound instead of pooling against it. Skip flush cuts against the trunk entirely, since they strip away the protective tissue an oak relies on to wall off damage and keep decay from spreading inward.
Step 4. Seal the wound and clean up safely
Apply a wound sealant or pruning paint to every cut immediately, within minutes if possible, rather than letting the fresh surface sit exposed to the air. This is one of the rare cases where sealing goes against general pruning advice for other tree species, but with oaks, that thin barrier blocks sap beetles from smelling the fresh wound before the tree can start its own natural sealing process.
Skip the sealant on an oak and you're leaving the door open for beetles to find that cut within hours.
Clear debris before you walk away
Gather every cut branch, twig, and pile of sawdust before you leave the site, since fallen wood and shavings can still carry spores that spread to other oaks nearby. Bag or haul away the debris rather than leaving it stacked against the trunk, or book a professional yard cleanup for the load, and give your tools one final wipe with the disinfecting solution from Step 1.
Watch the tree afterward
Check the pruned branches over the following weeks for wilting leaves, dark streaking under the bark, or sudden leaf drop, all early signs of infection. Catching a problem early gives you a real shot at saving the tree before it spreads further.
Keeping your oak healthy for years to come
Getting trimming a oak tree right comes down to a few habits: work during the dormant window, sanitize your tools between cuts, and seal every wound before beetles find it. Skip any one of these steps and you're rolling the dice with a disease that has no cure once it takes hold.
Most homeowners can handle light deadwood removal on a young oak with these steps in hand, but a mature tree with heavy limbs, storm damage, or signs of decay near the trunk calls for a different level of judgment. Weighing a chainsaw against a 40-foot canopy over your roof isn't the place to learn by trial and error, and one bad cut can undo years of tree health.
Our crews have made the safe call on hundreds of Pacific Northwest oaks since 2006. If your tree needs more than a light trim, schedule a free on-site estimate with our team before you pick up the saw.