
Stumps Tree Removal: How to Clear Them for Good
That stump in your yard isn't just an eyesore. It's a tripping hazard, a mower obstacle, and sometimes a launchpad for new sprouts you thought you were done with. If you're dealing with stumps tree removal after cutting down a hazardous or diseased tree, you've probably already found out that the stump is often the harder half of the job. Roots run deep, and a chainsaw alone won't finish the work.
This guide walks you through your real options, from DIY grinding methods using rented equipment to chemical rot accelerants that take weeks to work, and you can also compare every DIY stump removal method by cost and effort before you start. We'll also cover when it makes sense to just call in a professional crew with a stump grinder that can chew through a trunk in minutes instead of months.
We've pulled hundreds of stumps out of yards across Vancouver, Portland, and the surrounding Pacific Northwest since 2006, so we know which methods actually hold up against the region's soil, tree species, and soggy winters. Below you'll find clear steps for tackling stumps yourself, honest cost comparisons, and guidance on spotting when a job is beyond a weekend project .
Should you DIY it or call a stump removal pro
Before you rent a grinder or grab a shovel, size up the job honestly. Stump diameter and root depth decide whether a weekend project turns into a multi-day ordeal. A maple or alder stump under 12 inches wide, sitting in the loose, well-drained soil common in parts of Camas or Battle Ground, is a reasonable DIY target. A fir or oak stump over 20 inches, tangled with the clay-heavy, waterlogged soil typical of Vancouver winters, is a different story entirely.
What DIY stump removal really costs
Renting equipment isn't free, and your time has value too. Here's how the two paths stack up for a typical mid-size stump:
| Factor | DIY Approach | Professional Crew |
|---|---|---|
| Equipment rental | $75-$150/day | Included |
| Time investment | 4-8 hours (grinding) or 6-12 months (chemical rot) | 30-60 minutes |
| Physical risk | High (kickback, flying debris) | Low (trained operators) |
| Root/utility damage risk | Moderate to high | Low |
| Typical cost | $100-$300 in rentals and materials | $150-$500 per stump |
Chemical rot accelerants cost the least upfront but tie up your yard for the better part of a year, and they don't fully solve the problem, so it helps to know how stump grinding is priced by diameter, roots, and access before you decide. Roots keep sending up sprouts long after the visible stump is gone.
When it's time to call in a pro
Grinding through a stump near a septic line, a fence, or a foundation isn't the place to learn on the job. Underground utilities, buried irrigation lines, and root systems that have crept under a driveway all raise the stakes fast. Sloped yards and stumps near retaining walls add another layer of risk, since a grinder can kick up debris or lose footing on wet ground.
If the stump sits near a structure, utility line, or slope, hire a professional stump removal service instead of risking damage or injury.
Older stumps left from storm cleanup often hide rot pockets that collapse unpredictably under a grinder's weight, which is exactly the kind of surprise a trained crew knows how to handle when they weigh removal against grinding on a stump like yours.
Step 1. Gather the right tools and safety gear
Gathering the right gear before you touch the stump saves you a trip back to the rental store halfway through the job. A rented stump grinder runs $75-$150 a day at most home improvement stores, and you'll also want a mattock, a bow saw, and a sturdy digging bar for exposing roots. Don't skip the root saw , a specialized tool that cuts through fibrous roots a regular saw chain chokes on.
Tools checklist
- Stump grinder (rented or borrowed)
- Mattock or grub hoe
- Root saw or reciprocating saw with a pruning blade
- Digging bar and shovel
- Wheelbarrow for hauling debris
- Tarp to protect nearby lawn from wood chips
Safety gear you can't skip
Equipping yourself properly matters just as much as the tools themselves. Stump grinders throw wood chips and debris at high speed, and the teeth spin fast enough to cause serious injury if your footing slips on wet Pacific Northwest soil.
Never operate a grinder without eye protection, hearing protection, and steel-toe boots.
Fasten these items before you start:
- Safety glasses or a full face shield
- Ear protection (grinders often exceed 100 decibels)
- Steel-toe boots with good tread
- Heavy-duty gloves
- Long pants and a fitted long-sleeve shirt (no loose fabric)
Having a second person nearby to watch for hazards isn't required, but it's smart practice, especially on sloped or muddy ground where a grinder can shift unexpectedly.
Step 2. Expose and cut the major roots
Digging around the stump before you cut anything saves your blade and your back. Clear a trench about 18 inches out from the trunk with a mattock or shovel, working down until you hit the major root flares , the thick roots that radiate out from the base and anchor the tree. Wet Pacific Northwest clay clings to roots, so hose down the trench as you go to keep the digging manageable and spot roots you'd otherwise miss.
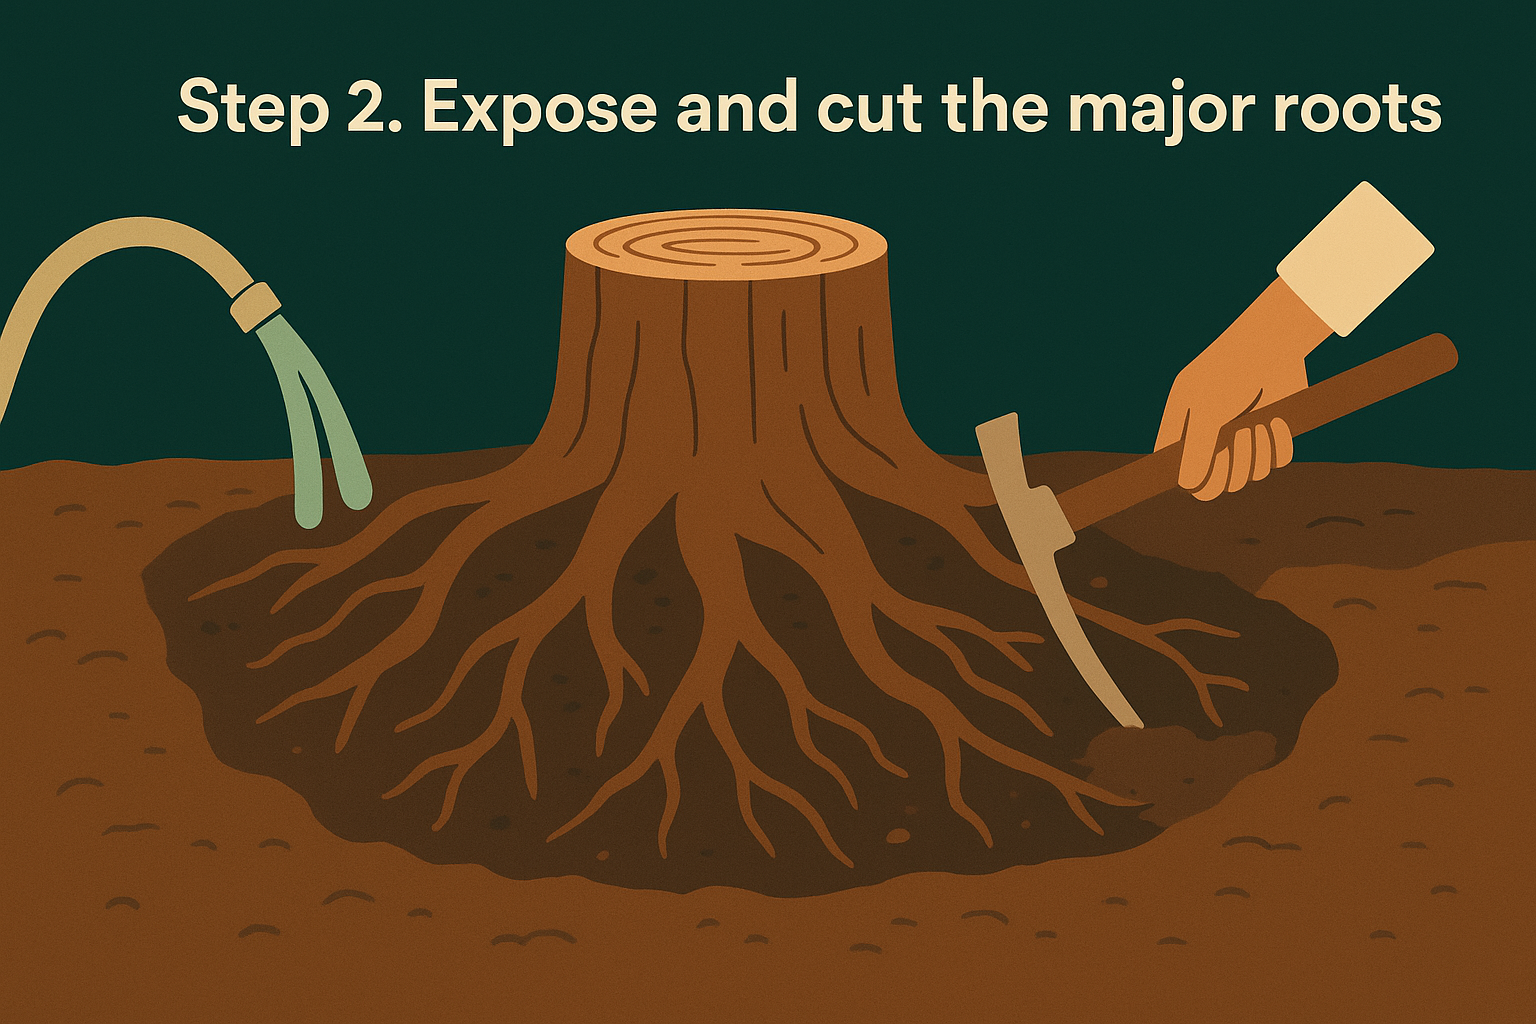
Cutting through the anchor roots
Once you've exposed a root, cut it close to the trunk with a root saw or a reciprocating saw fitted with a pruning blade. Regular chainsaw chains dull fast against soil-packed roots, so keep a rinse bucket nearby to clean the blade between cuts.
- Cut the largest roots first, usually the ones running toward the yard's open space
- Work in a circle around the stump so no single side stays anchored
- Sever roots at least a foot from the trunk to give the grinder or winch more room to work
- Leave smaller feeder roots for later; they'll come out with the stump
A stump with its main anchor roots cut is already halfway removed, even before the grinder starts.
This groundwork determines how smoothly the next stage goes, especially if you're leaning toward pulling the stump rather than grinding it down.
Step 3. Grind or pull the stump from the ground
Grinding is the faster route once the anchor roots are cut. Lower the grinder wheel onto the stump in small passes, moving side to side rather than plunging straight down, since the teeth chew through wood far better than they punch through it. Keep grinding until you're at least 6 inches below grade so nothing pokes through when you fill the hole later, and see our step-by-step guide to grinding a stump for the full technique. Stump grinding equipment kicks up a steady spray of wood chips, so work the tarp you set up earlier around the base.
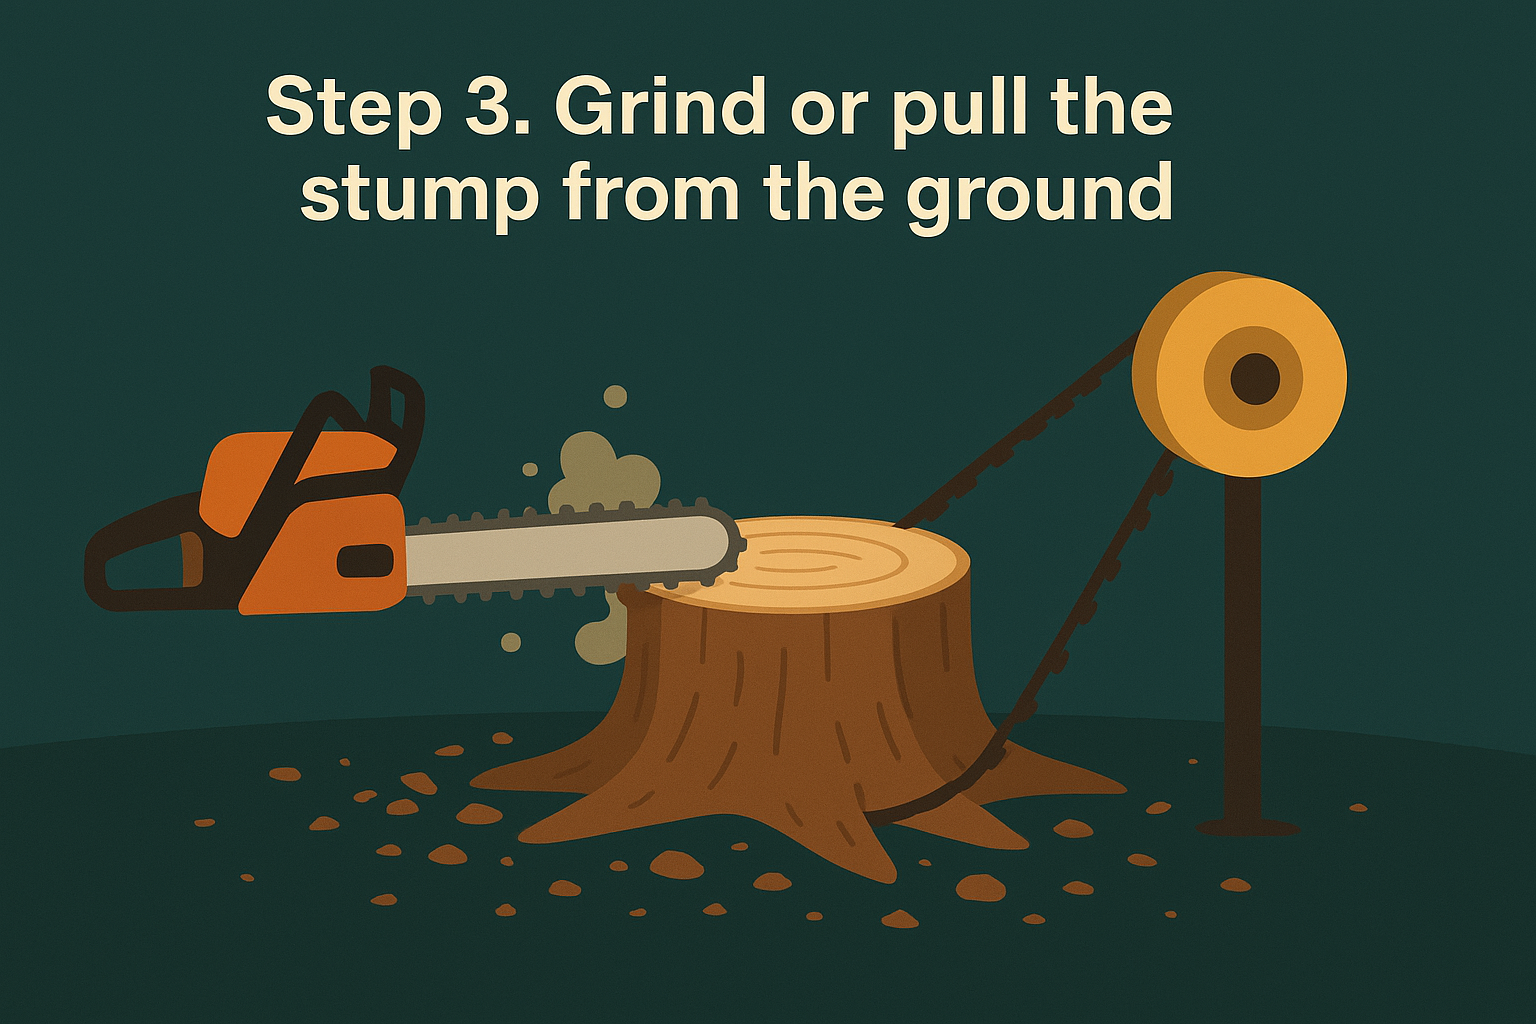
When pulling makes more sense
Smaller stumps, especially shallow-rooted species like alder or cottonwood, sometimes come out faster with a chain and a winch or truck than with a grinder. This works best when the trunk still has enough height left to grip.
A stump with cut anchor roots and a chain wrapped low on the trunk will often pop free with steady, low-gear pulling, no grinder required.
Follow this sequence if you're pulling instead of grinding:
- Wrap a heavy chain as low on the trunk as possible
- Attach the other end to a winch, tractor, or truck hitch
- Pull in low gear with steady, even tension, never a sudden jerk
- Stop and re-cut any root that resists rather than forcing the pull
Either method leaves you with a hole and a pile of debris, which is exactly what the next step tackles.
Step 4. Fill the hole and restore your yard
Backfilling the crater left behind is where most DIY jobs go wrong. Wood chips alone will sink over time as they decompose, leaving a dip that fills with water during Pacific Northwest winters. Mix the leftover chips with topsoil in roughly equal parts, then tamp down each layer as you fill so the ground doesn't settle unevenly later.
Layering the fill correctly
Getting the layers right now saves you a return trip with more soil in a month. Pour a few inches of the chip-and-soil mix, compact it with your foot or a hand tamper, then repeat until you're level with the surrounding grade. Top the final layer with pure topsoil so grass seed has something clean to root into.
- Fill in 3-4 inch layers, compacting each one
- Mound slightly above grade since fill settles
- Water the area to help it compact naturally
- Wait one to two weeks before seeding
Skip the compaction step and you'll be back out here next spring filling the same hole again.
Reseeding or replanting
Seeding is the simplest fix for most yards, but if you're planning a new tree removal and replanting project nearby, give the soil a season to settle first. Scatter grass seed suited to your region, cover lightly with straw, and keep the area moist until it fills in, then finish with a full-service yard cleanup to clear the last of the debris.
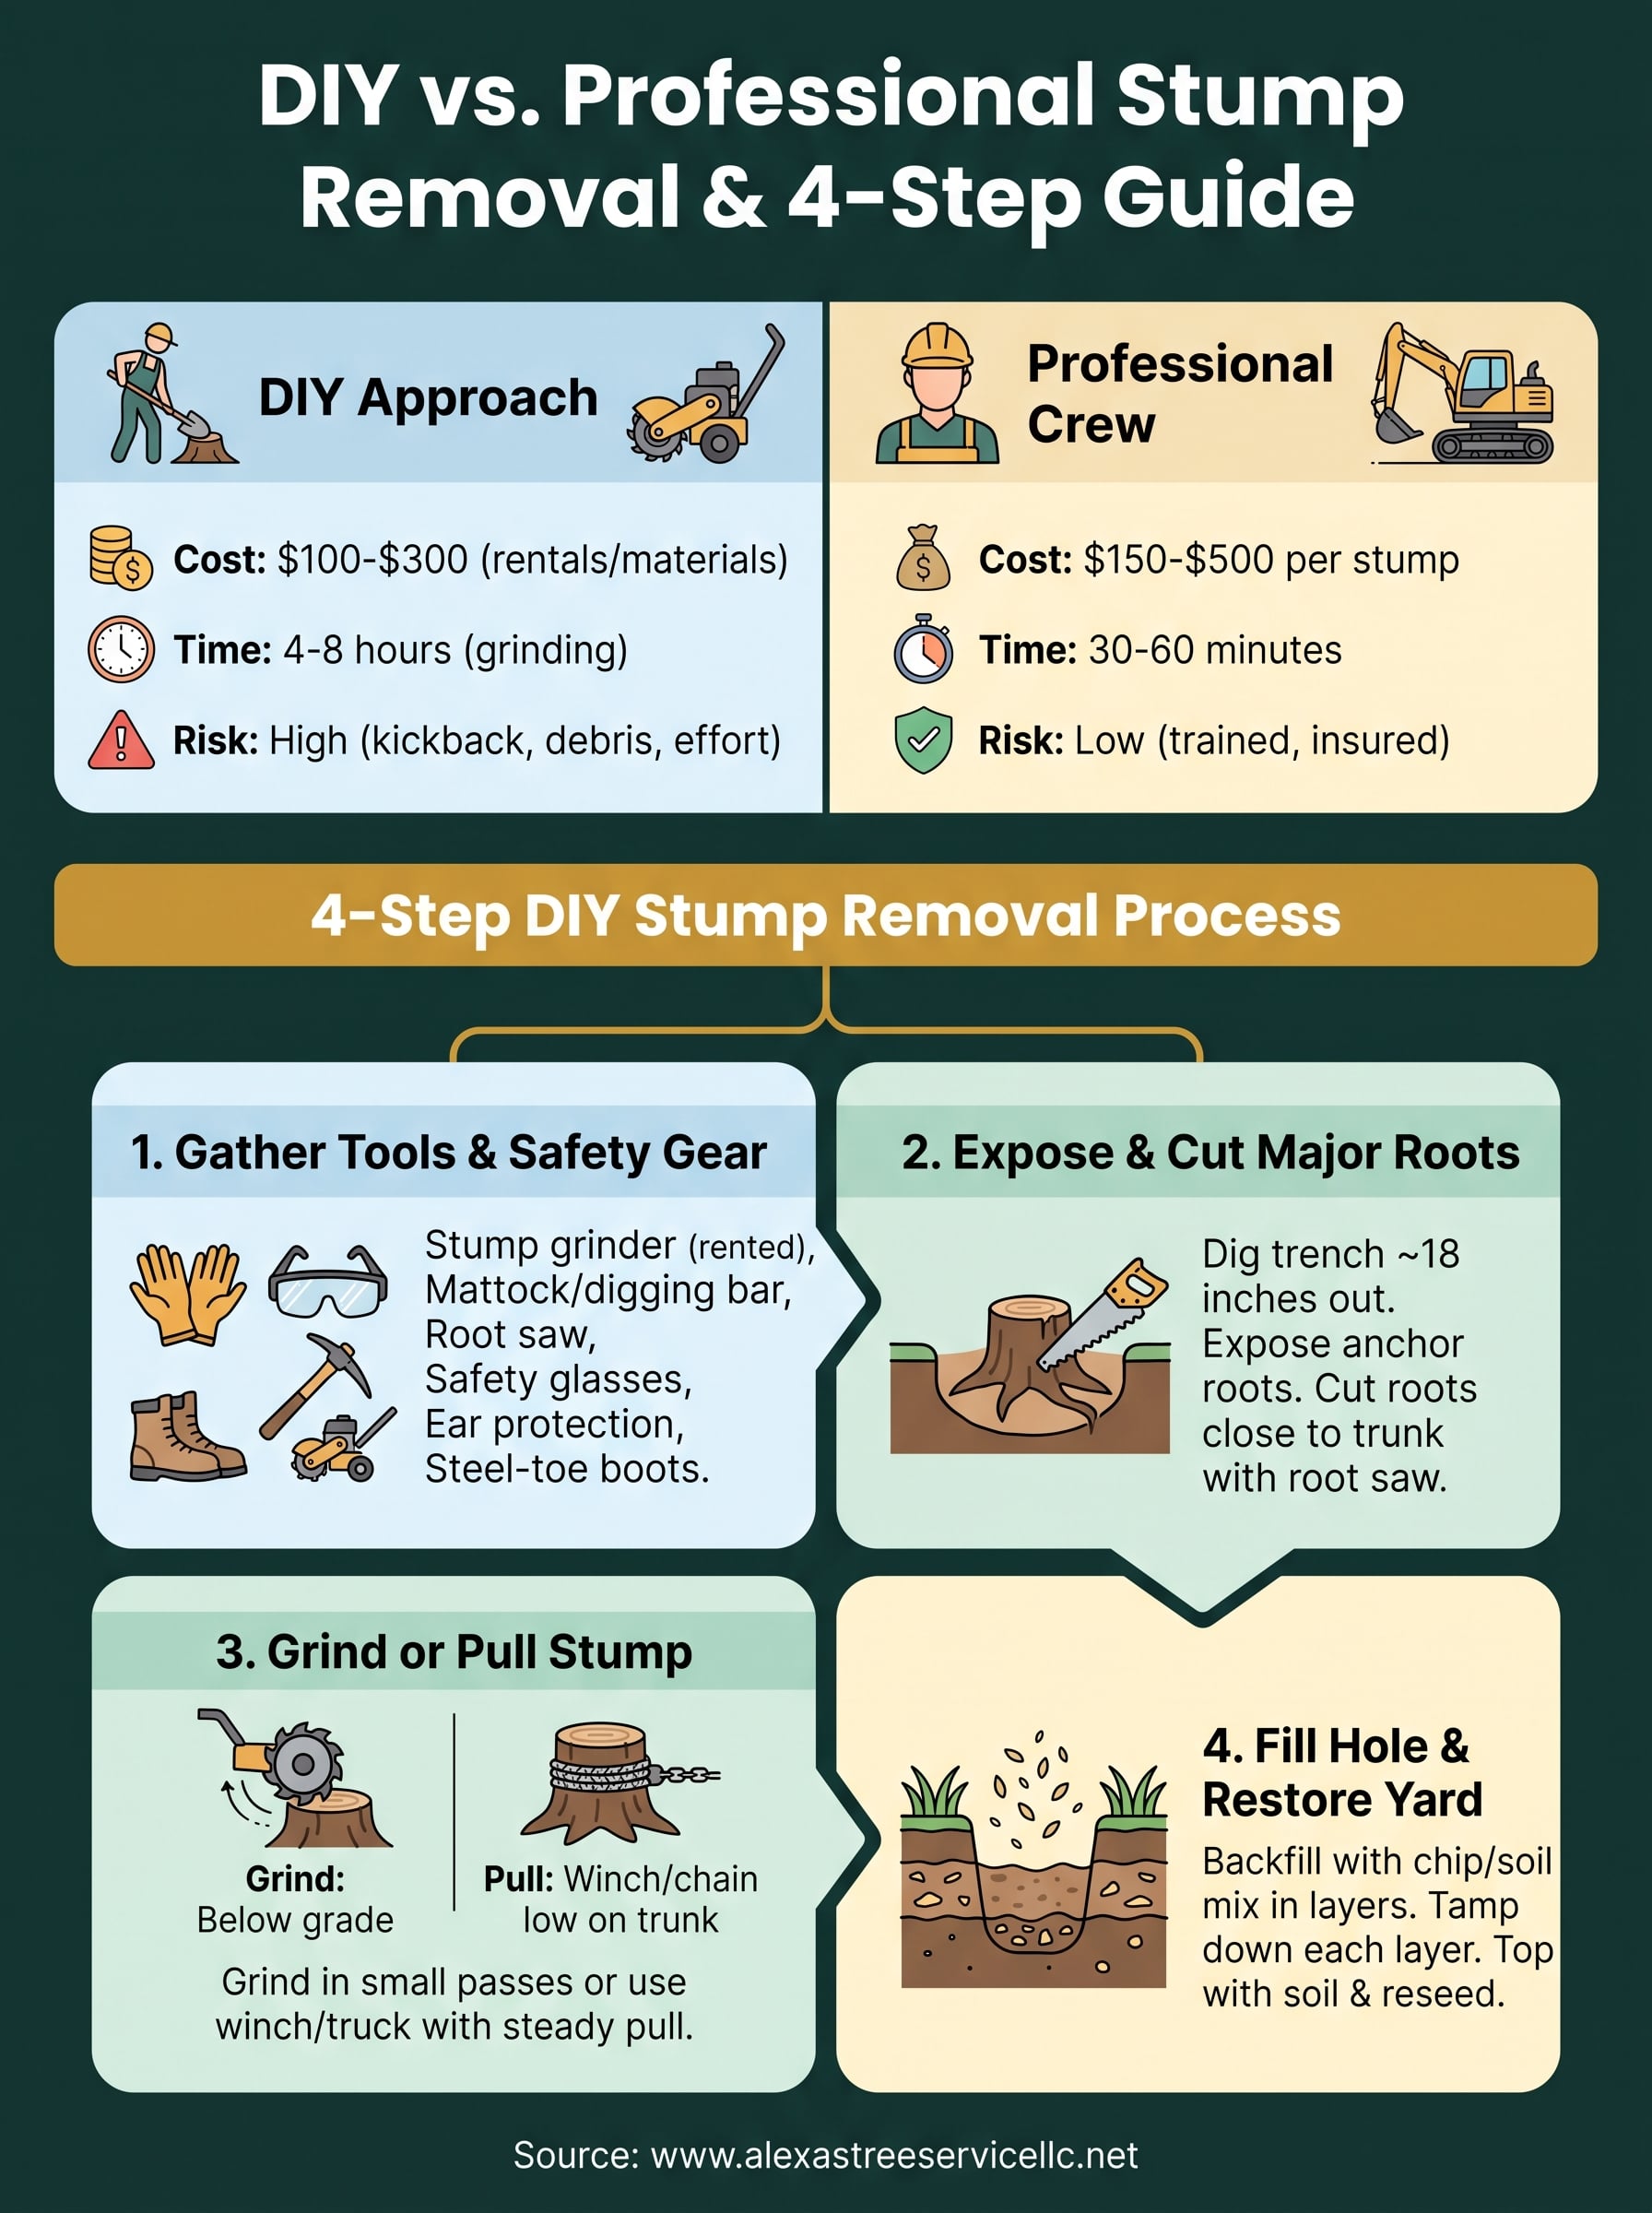
From stump to smooth lawn
A stump doesn't have to sit in your yard for another season. Whether you grind it down yourself with rented equipment or pull it free with a winch, the same rule applies: cut the anchor roots first, then finish the job with a proper fill that won't sink or leave a soggy dip come winter. DIY stump removal works fine for smaller stumps in loose soil, but once you're dealing with a fir or oak tangled in clay, near a fence, or leaning over a septic line, the math tips toward hiring help.
We've cleared stumps out of yards across Vancouver and Portland since 2006, and we know which ones are worth a weekend and which ones aren't. If you'd rather skip the rental counter and the sore back, book fast, complete stump removal in Vancouver, WA from Alexa's Tree Service and get your lawn back this week, not next spring.