
Trimming a Fruit Tree: 4 Steps to Better Shape and Fruit
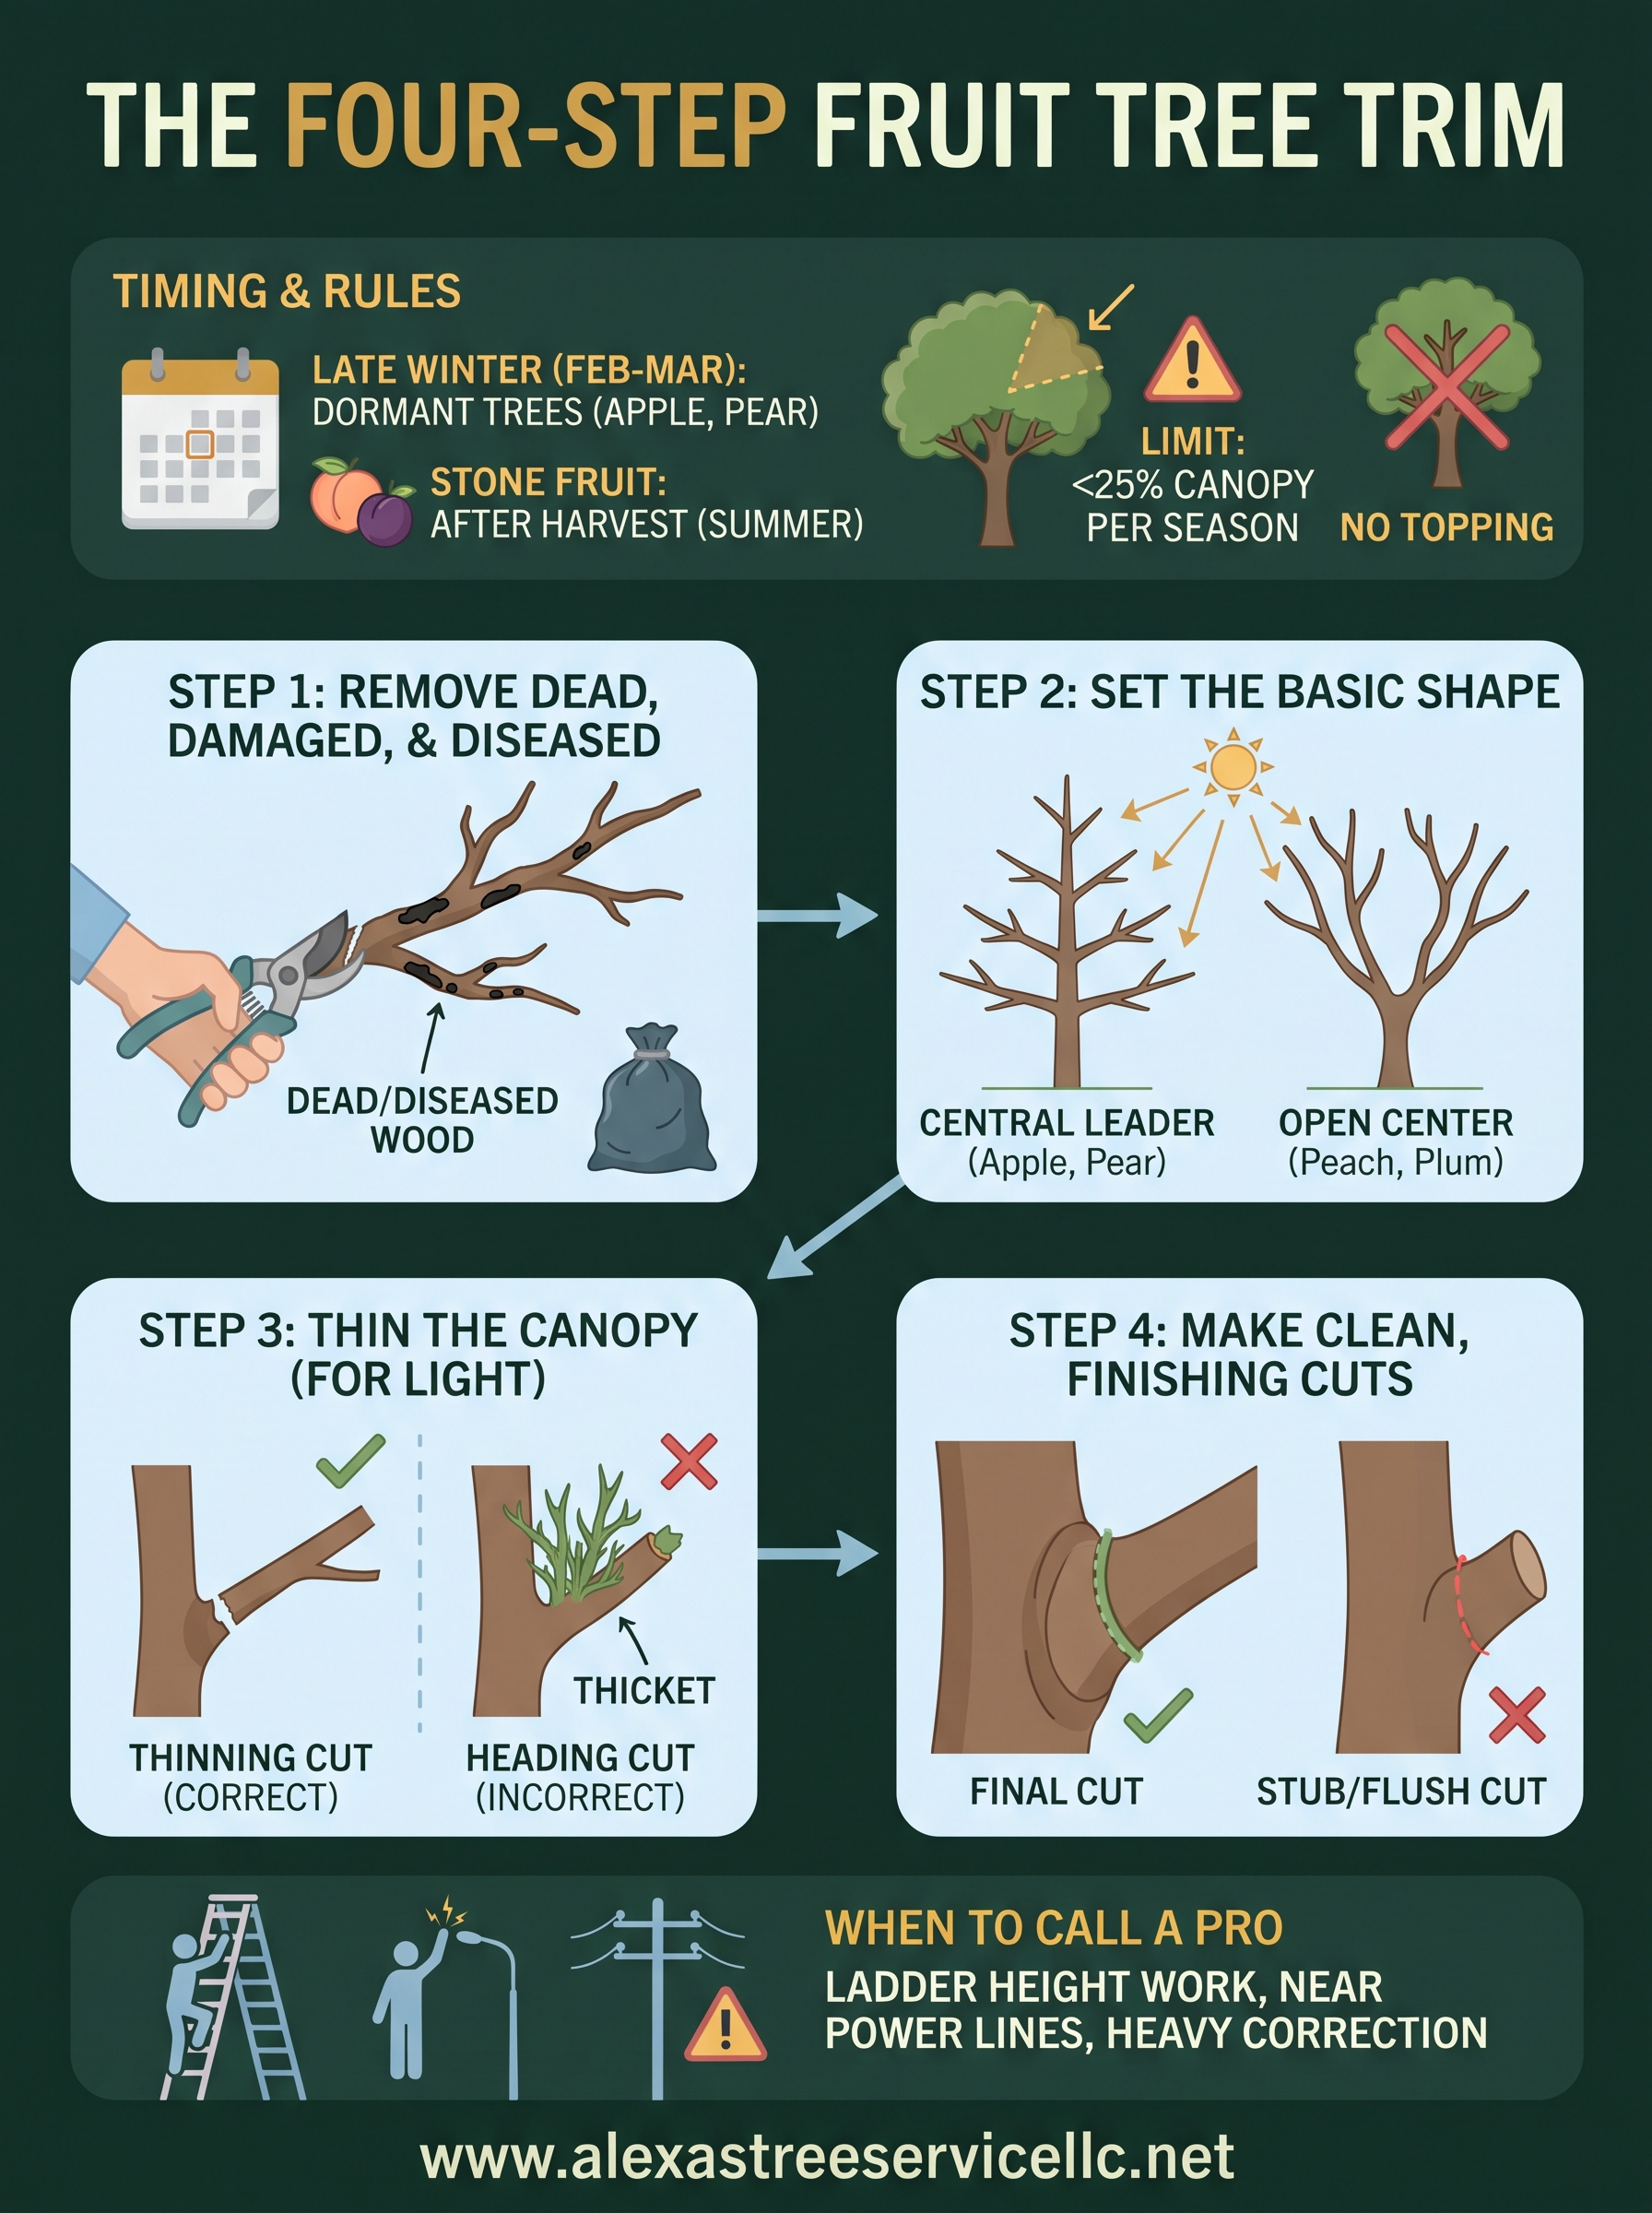
The best way to approach trimming a fruit tree is to work in four steps while the tree is dormant in late winter. Remove dead, damaged, and diseased wood first. Then set the tree's basic shape, thin the canopy so light reaches the center, and finish with clean cuts just outside the branch collar. Never take off more than 25% of the living canopy in one season. For apples and pears around Portland and Vancouver, the window is February and March.
Most backyard fruit trees fail in one of two ways. Left alone, they grow a tangle of crossing limbs, with small fruit, more disease, and branches too high to pick. Cut too hard, they answer with a thicket of fast vertical shoots and fewer apples. Both problems come from not knowing what each cut does.
Alexa's Tree Service has trimmed trees in Vancouver, WA, and Portland, OR, since 2006, and this guide follows that same hands-on approach. You will learn when to cut, which tools to use, how to make each cut, and which mistakes cost the most fruit.
Before you cut: timing, tools, and tree type
When to trim a fruit tree by month
Trim most fruit trees in late winter, February through March in the Vancouver and Portland area, while the tree is dormant and before buds swell. Bare branches make the structure easy to read, and the wounds begin healing as spring growth starts. Stone fruits are the exception, as the calendar shows.
| Tree | Best window in the Pacific Northwest | Why |
|---|---|---|
| Apple, pear | Late winter (February to March) | Dormant tree, clear view of structure |
| Peach, nectarine | Late winter to early spring, as buds swell | Fruit forms on last year's growth, so you can judge what to keep |
| Plum, apricot, sweet cherry | Summer, after harvest | Dry weather keeps disease out of fresh cuts |
| Any tree | Any time of year | Dead or broken limbs can go whenever you spot them |
Fall is the wrong season for real pruning. Cuts made in autumn can trigger new growth that frost kills, and wet weather carries fungal spores into fresh wounds. Do only emergency work then. As for being too late, once leaves have fully opened, stop structural cuts and limit yourself to light thinning.
Tools you need
You need four tools, and sharp bypass blades matter more than brand. Anvil-style pruners crush live wood, while bypass pruners cut cleanly.
| Tool | Cuts up to about | Use it for |
|---|---|---|
| Bypass hand pruners | ¾ inch | Twigs, water sprouts |
| Loppers | 1½ inches | Small branches |
| Pruning saw | 1½ inches and up | Main limbs |
| Pole saw | Same as saw | Branches above your reach |
Wipe the blades with rubbing alcohol before you start and again between trees. Clean, sharp blades leave smooth wounds that close faster.
Know your limit before you start
Decide how much you will remove before the first cut, because 25% of the living canopy per season is the ceiling. On a tree with 20 limbs of similar size, that is about five limbs, not ten. If an overgrown tree needs half its growth gone, spread the work over two or more winters.
Spread heavy corrections over several winters, because a tree pruned too hard answers with water sprouts instead of fruit.
Step 1. Remove dead, damaged, and diseased wood
Start every session by removing dead, damaged, and diseased wood. These cuts are always correct, and they show you what structure you have left to work with.
What to cut first
Walk around the tree and mark everything on this list before you cut.
- Dead wood: brittle, with no buds, and no green when you scratch the bark.
- Broken or torn limbs: snapped by wind, fruit load, or a past storm.
- Diseased wood: sunken or oozing cankers, or shoots that blacken and curl into a shepherd's crook.
- Suckers: shoots rising from the base or roots, which draw energy from the fruiting tree.
- Mummified fruit: shriveled fruit still hanging on, which can carry disease into the next season.
Handle diseased wood carefully
When you cut out disease such as fire blight on an apple or pear, make the cut 8 to 12 inches below the visible damage, into healthy wood. Wipe the blades with rubbing alcohol after every cut so you do not carry the problem to the next branch.
Bag the cuttings and throw them out. Do not compost them or leave them under the tree.
Sterilize your blades after cutting diseased wood, or you spread the problem to the next branch.
Step 2. Set the shape of the tree
Pick one of two forms and prune toward it: a central leader for apples and pears, or an open center for peaches and most plums. Think of the shape as a diagram you hold in your head while you cut.
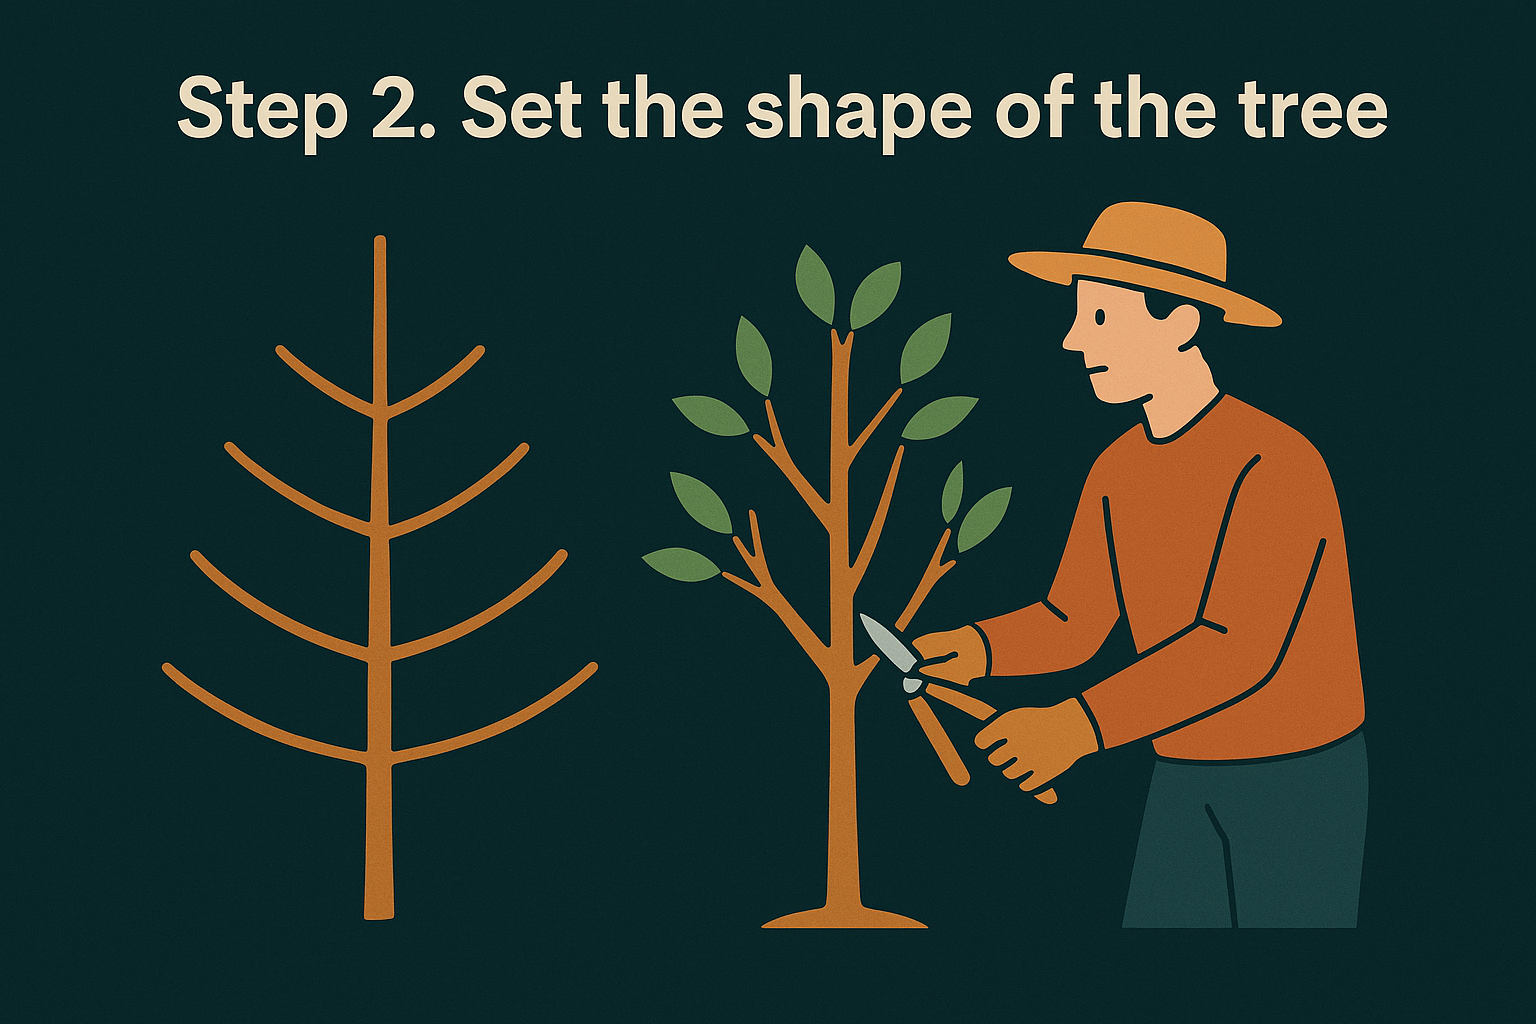
Choose your form
| Form | Best for | What it looks like |
|---|---|---|
| Central leader | Apple, pear | One upright trunk with side branches spaced around it, longest at the bottom, so the tree forms a cone |
| Open center | Peach, nectarine, plum | Three or four main limbs rising from a short trunk, with the middle kept open like a vase |
Both forms do the same job. They put light on every branch and keep fruit within reach.
Pick strong scaffold branches
Scaffolds are the main side limbs that carry the fruit, so choose them with care. Keep limbs that are spaced several inches apart vertically and spread around the trunk, so none sits directly above another. Favor wide branch angles , roughly 45 to 60 degrees from vertical. Narrow V-shaped joints trap bark and tend to split under a heavy crop.
If a central-leader tree has two upright leaders competing, remove the weaker one. On a young tree, shape early with light cuts and keep as much leaf area as you can. Structure set in the first few years pays off for decades.
Choose your scaffold branches by angle and spacing, not by size, because a wide, well-spaced limb outlasts a thick, crowded one.
Step 3. Thin the canopy and control height
Thin the canopy by removing whole branches back to where they start, instead of shortening many branches, so light and air reach the center of the tree.
Thinning cuts versus heading cuts
A thinning cut removes a branch at its junction. A heading cut shortens a branch to a bud, which sends out dense, bushy regrowth just below the cut. Prefer thinning almost every time.
Work through the tree in this order, and stop when you hit your 25% limit:
- Water sprouts, the vertical shoots growing straight up from limbs.
- Branches that cross or rub against each other.
- Branches growing inward toward the trunk or hanging downward.
- One of any two parallel limbs growing too close together.
Apples and pears fruit on short spurs along older wood, so leave the spurs alone. Peaches and nectarines fruit on last year's growth, so they need some renewal each winter.
Thin to let light in, and shorten only when you must, because every heading cut buys you a thicket.
Keep a tall tree small
If you are wondering how to prune an apple tree that is too tall, cut the tall leader back to a strong, outward-facing side branch. This is called a drop-crotch cut. Do it over two or more winters , never as one big chop. Aim for a height of around 8 to 10 feet, so you can pick from the ground or a low stepladder.
Never top the tree by cutting limbs to stubs. Topping creates weak, fast regrowth. A light trim of new shoots in summer also slows growth more than winter cuts do, which helps if you want to keep a tree compact.
Step 4. Make clean cuts and avoid common mistakes
Make each cut just outside the branch collar, the slightly swollen ring where a branch meets its parent. Use three cuts for any limb thicker than about 1½ inches, so the bark does not tear down the trunk.
The three-cut method
- Undercut: about 12 inches from the trunk, cut upward through one quarter to one third of the branch.
- Top cut: a couple of inches farther out, cut down from above until the limb drops.
- Final cut: remove the remaining stub just outside the collar. Do not cut flush with the trunk, and do not leave a stub.
You do not need wound paint. A clean cut at the collar seals itself.
A cut just outside the branch collar heals fastest, so never cut flush and never leave a stub.
Mistakes that cost you fruit
| Mistake | What happens | Fix |
|---|---|---|
| Removing over 25% in one year | Water sprouts, stressed tree | Spread the work over several winters |
| Topping limbs to stubs | Weak, dense regrowth | Cut back to a side branch |
| Flush cuts or long stubs | Slow healing, decay | Cut at the collar |
| Pruning stone fruit in wet winter | Disease enters wounds | Prune in summer after harvest |
| Dull or dirty blades | Ragged wounds, spread disease | Sharpen and wipe with alcohol |
When to call a pro
Call a professional when the work is above ladder height, near power lines, or on limbs too thick for your saw. A neglected tree that needs several years of correction also deserves a trained eye. A fall from a ladder is a far bigger risk than a badly shaped tree.
Alexa's Tree Service offers Tree Trimming priced at $200–$800+. It removes dead, diseased, or oversized branches and keeps to the 25% canopy limit. For ongoing care, Tree Care & Maintenance plans cover seasonal pruning and health checks.
Start with one good winter of cuts
Trimming a fruit tree comes down to timing and restraint. Cut in late winter for most trees, remove dead and diseased wood first, shape toward a central leader or open center, thin rather than head, and cut cleanly at the collar. Keep every season under 25% of the canopy and let the tree recover.
If a limb is out of reach or the tree needs more than a light correction, get a free estimate from Alexa's Tree Service and let a licensed, insured crew handle the heavy cuts.